Set up a Paid Newsletter at Your Own Domain
Step-by-step instructions on setting up a paid newsletter and blog at your own custom domain.


Here's how to set up a paid (or free!) newsletter using Ghost at a new custom domain.
Ghost is an alternative to Substack that allows you to start hosted and then migrate to your own server when desired. It's open source, so it's fully customizable. And it has membership and monetization features included.
Why not Substack? It's wonderful, but as a centralized service it doesn't offer the same degree of customizability and flexibility. You can however get started there a bit more easily, and it has leaderboards and a community.
Why not Wordpress? It's also wonderful, but it's not as modern as Ghost is. You can however quickly set up on wordpress.com and migrate to a self-hosted version using wordpress.org, just like Ghost.
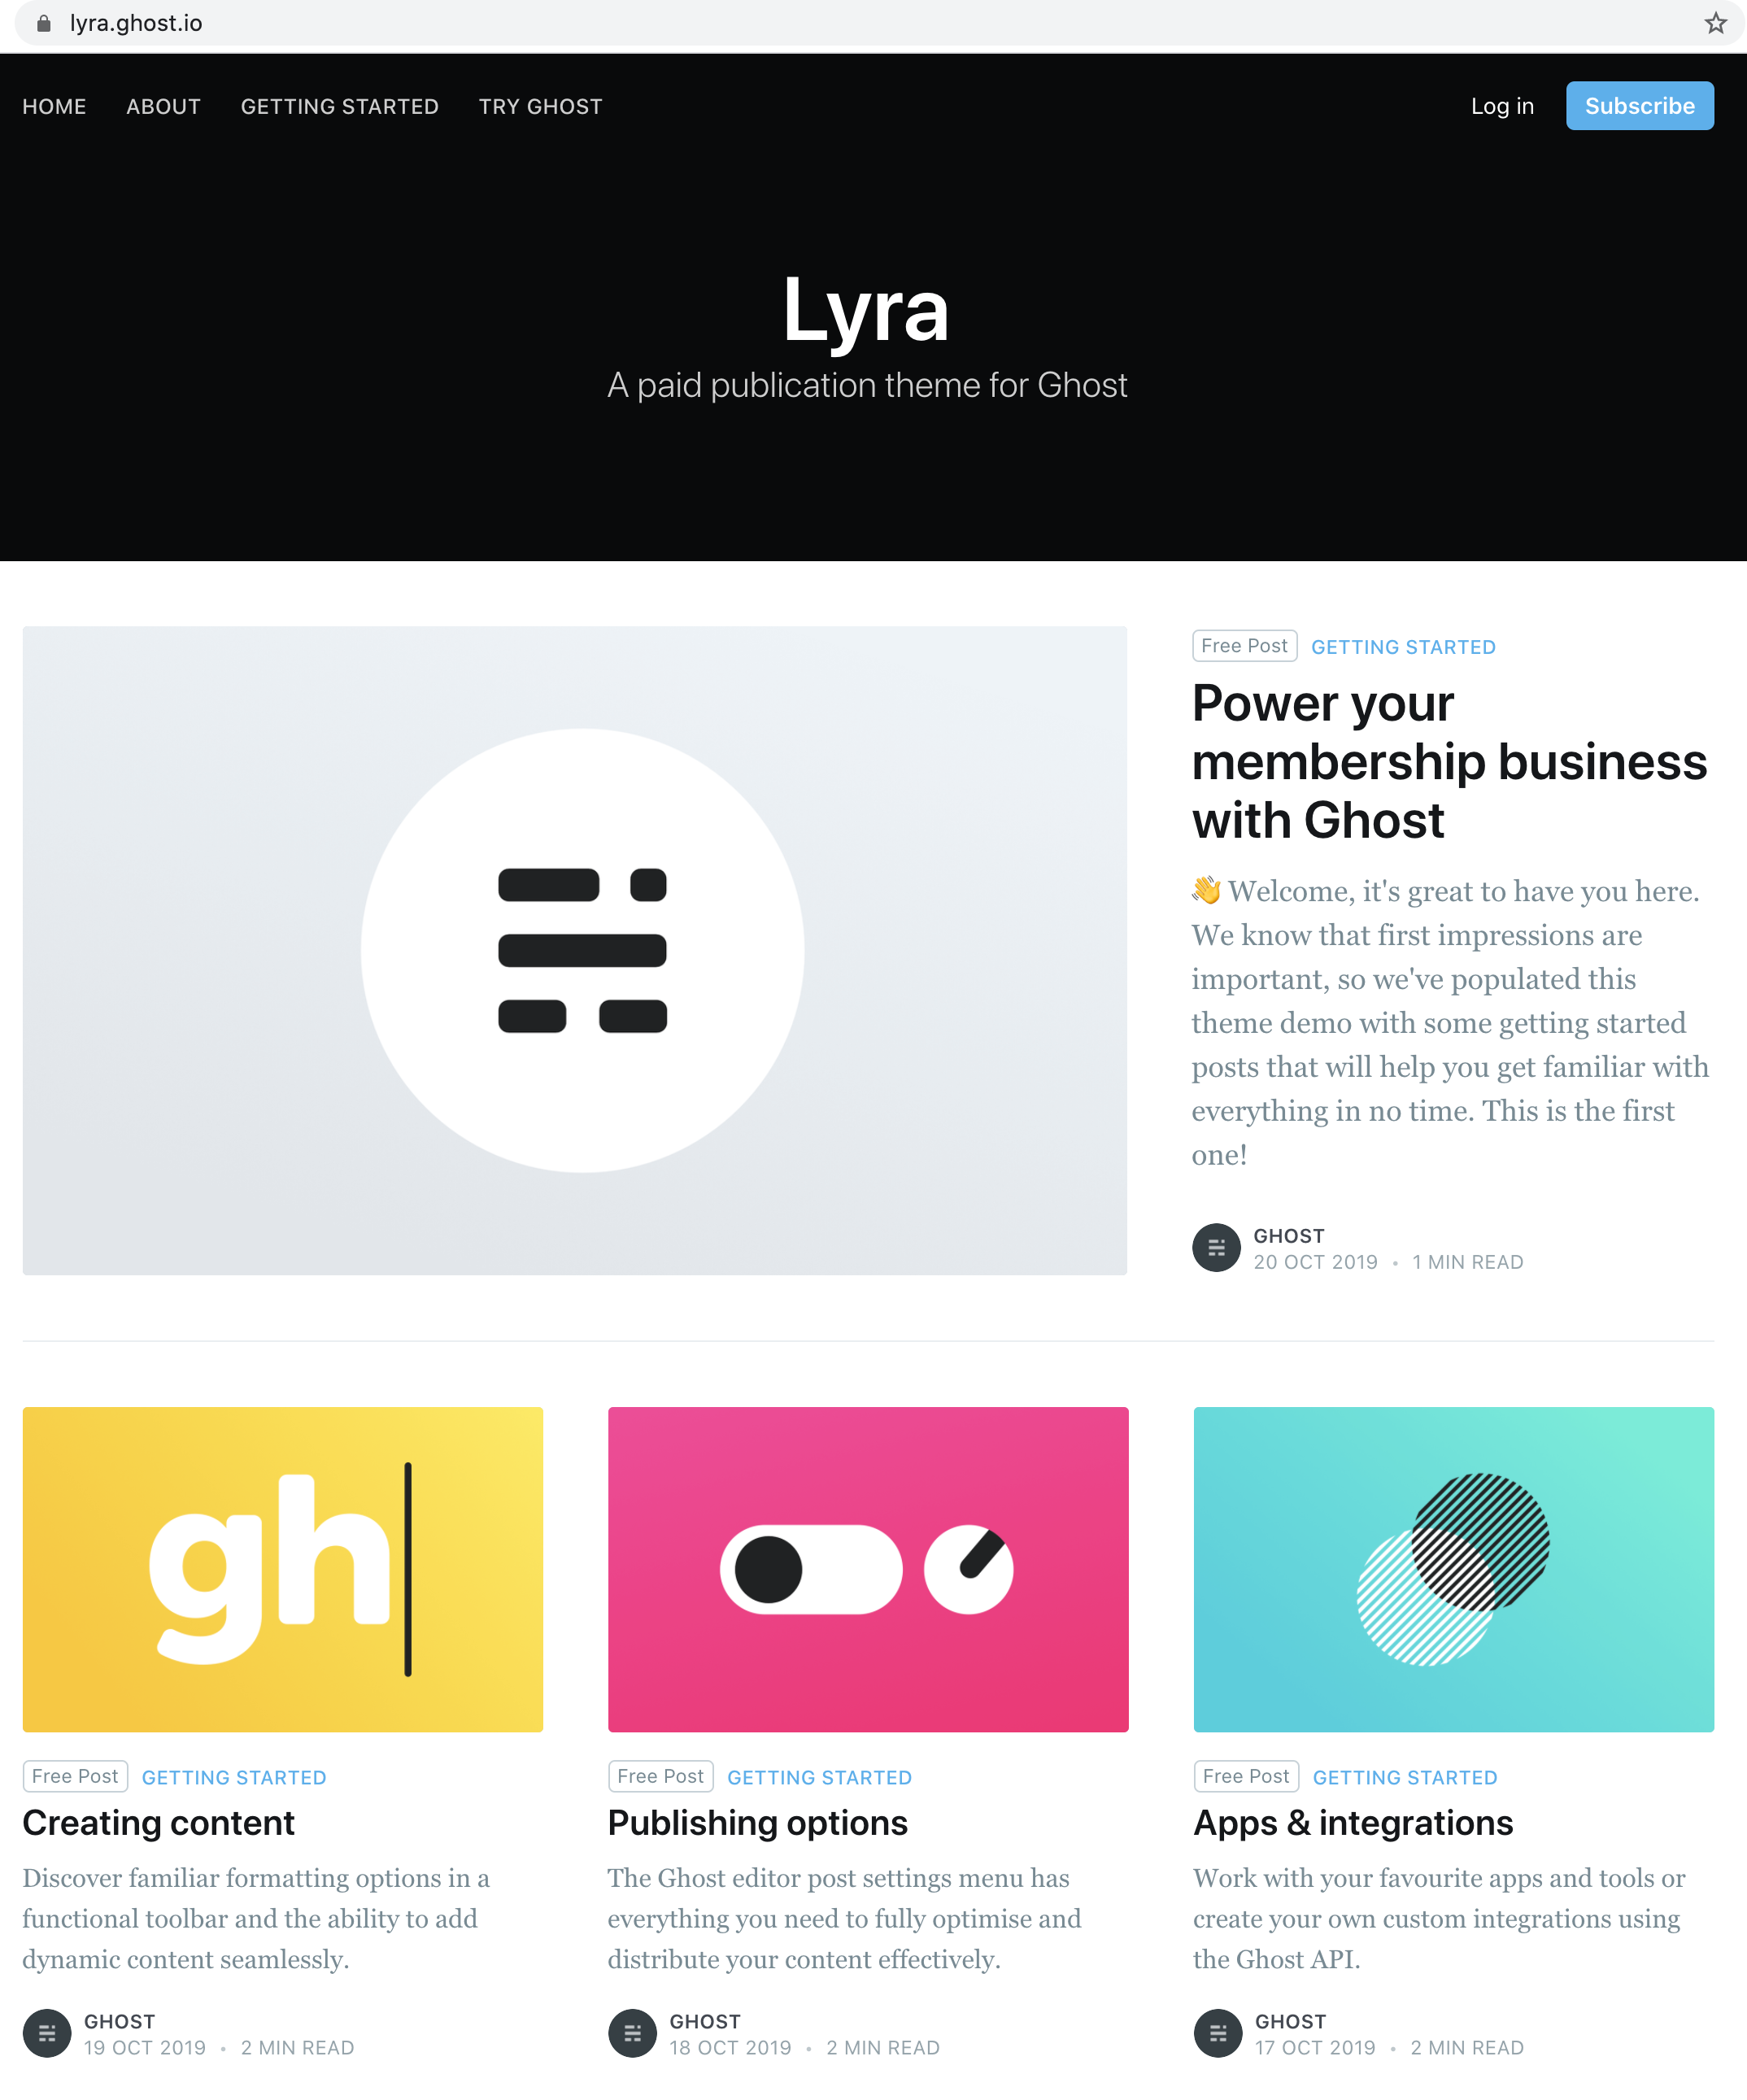
If you follow the instructions in this post, your blog will look something like this when done. Note the "subscribe" button in the upper right corner!
Before we begin: a note on pseudonymity and opsec
One of the awesome things about Ghost is that it allows you to build an audience and monetize pseudonymously to protect your privacy. Do you want to set up a pseudonymous blog? If so, there are two options for you.
- State-level opsec. For maximum opsec, before following the instructions below you want to get a new laptop, a VPN, and a prepaid debit card. You also want to read this post by Lopp and this by Snowden and do seemingly paranoid things that are beyond the scope of this post.
- Crowd-level opsec. Most people don't need quite that level of security yet, unless they are doing NSA-level stuff. Just setting up a new email, using a pseudonym on your blog, and configuring private domain registration will guard your privacy against much of the internet at large.
Note that either way, the people with root access to the services below (Protonmail, Cloudflare, Ghost, Stripe, and optionally GitHub) will have data on you. Still, basic precautions will reduce your attack surface.
Step 1: Get an email and a domain
The first step is to get a new email and register a custom domain.
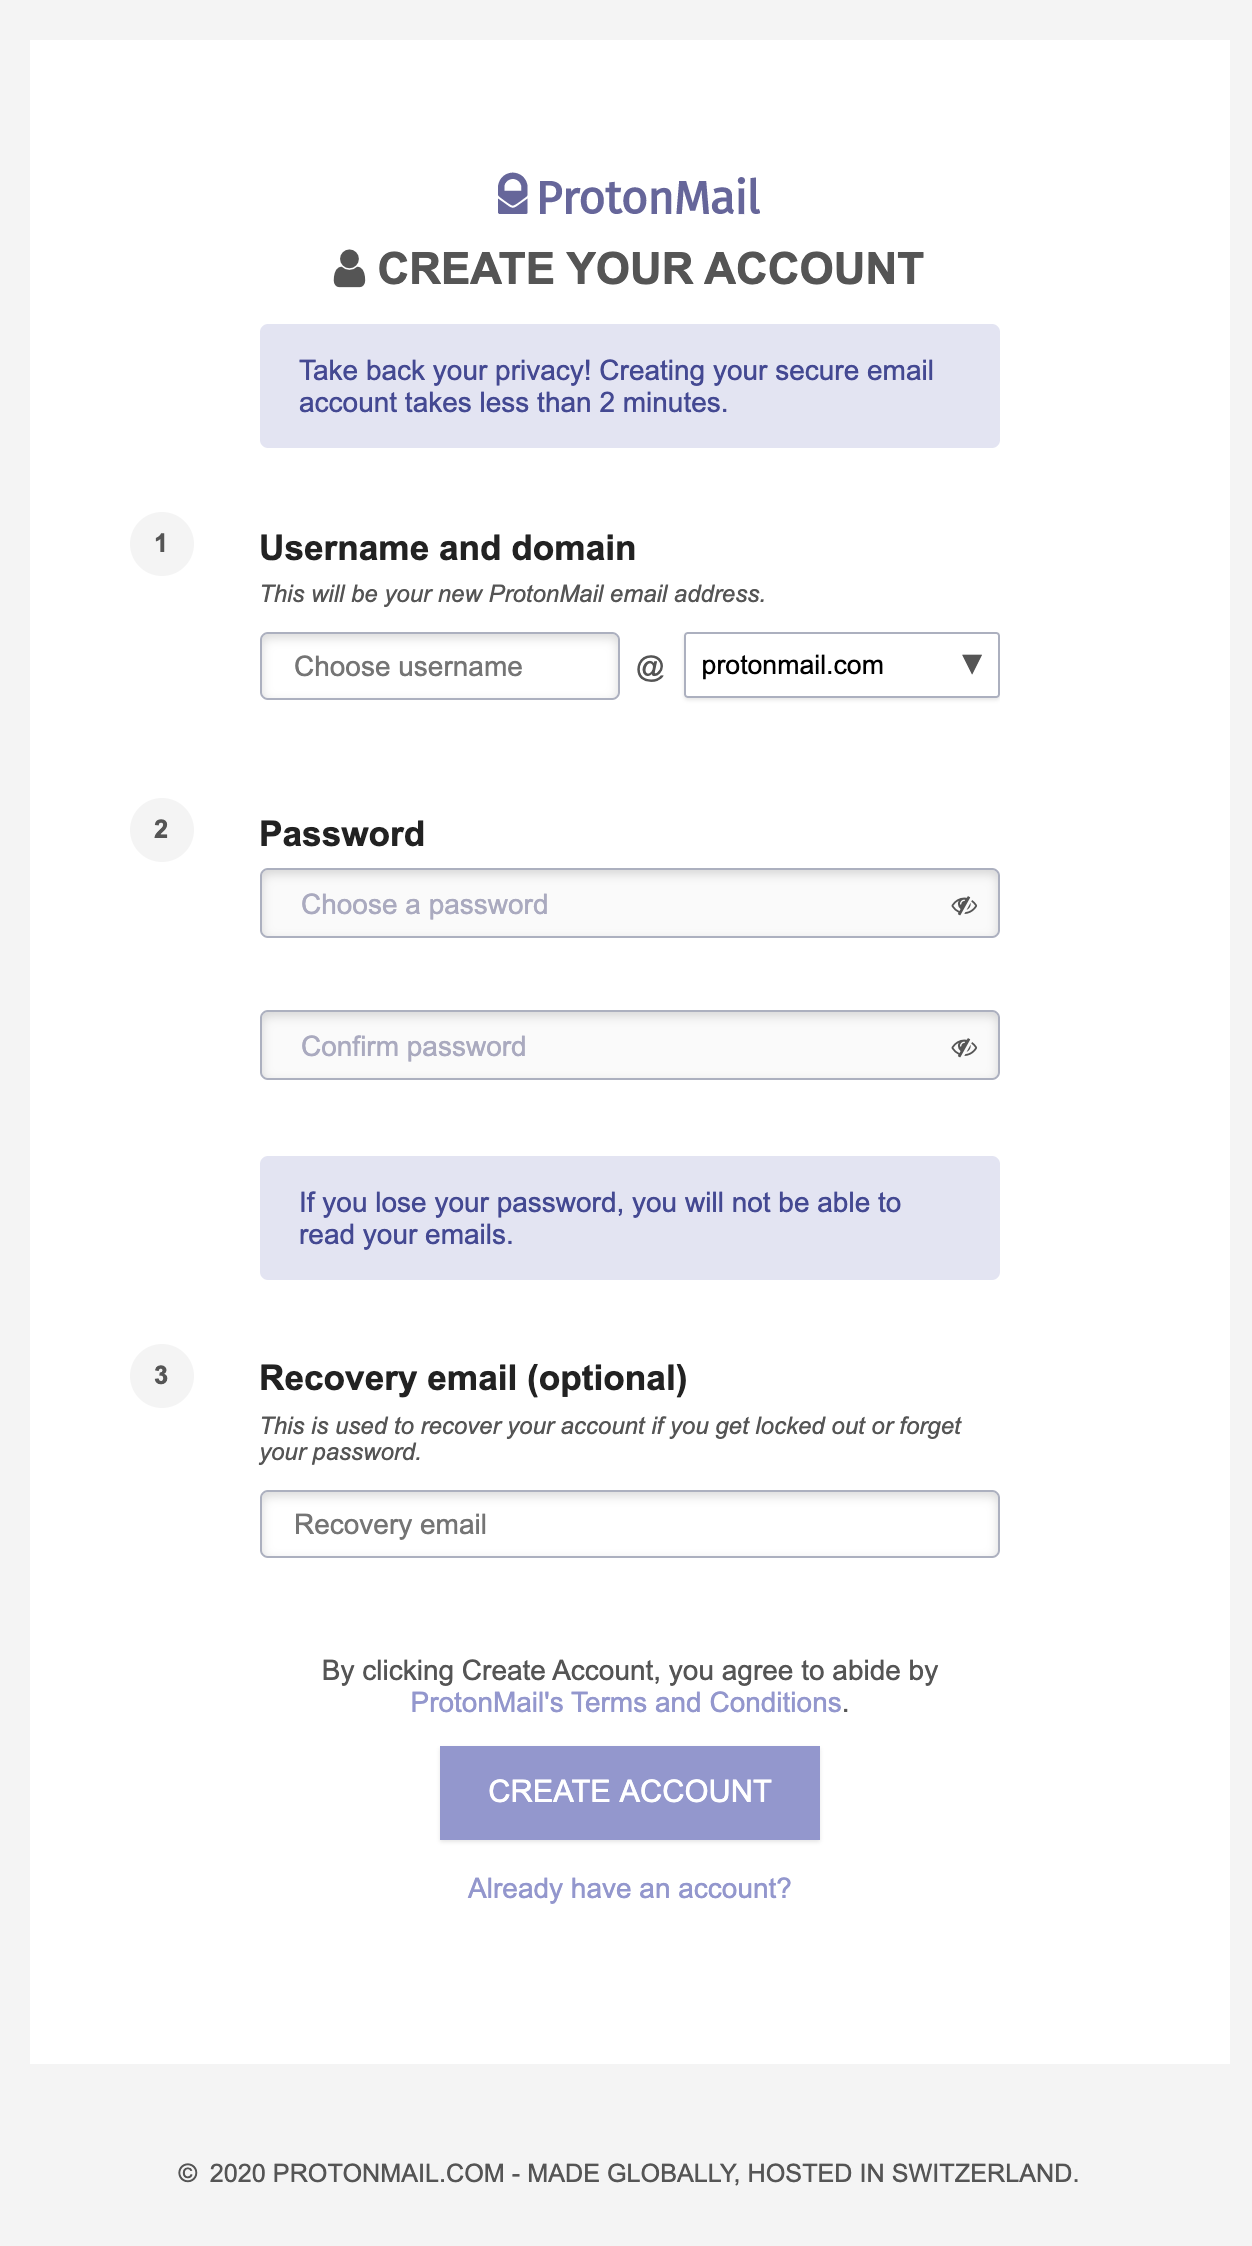
- Get a new protonmail.com address.
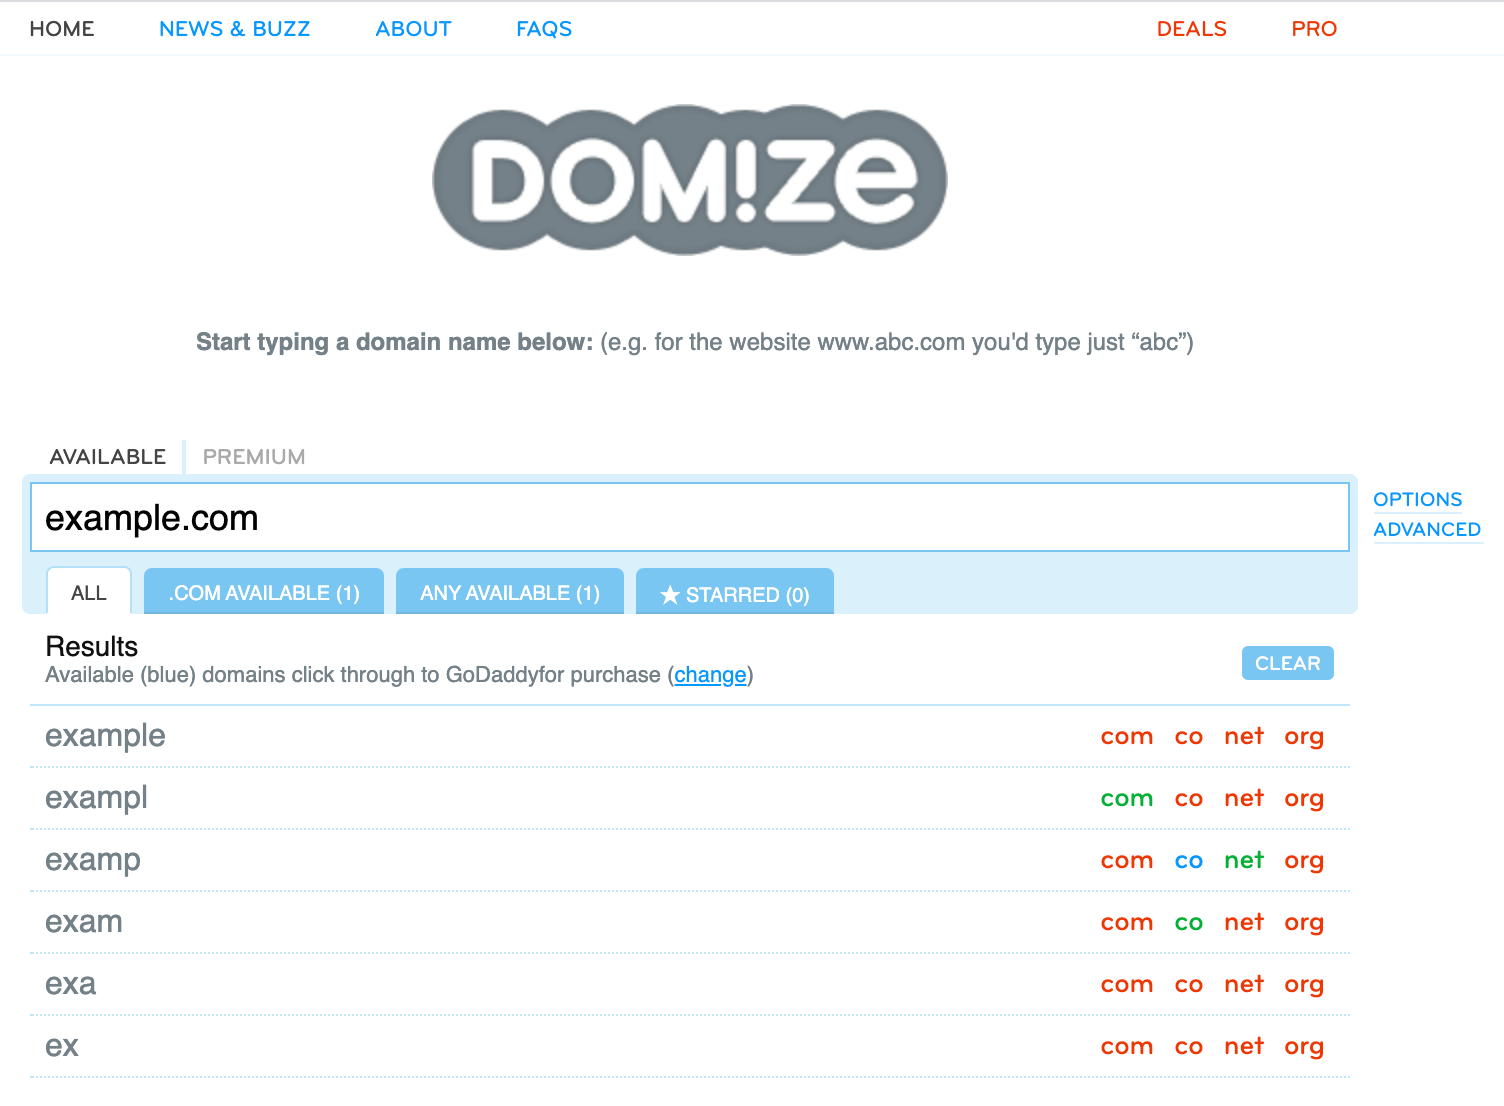
- Find a new domain using domize.com.
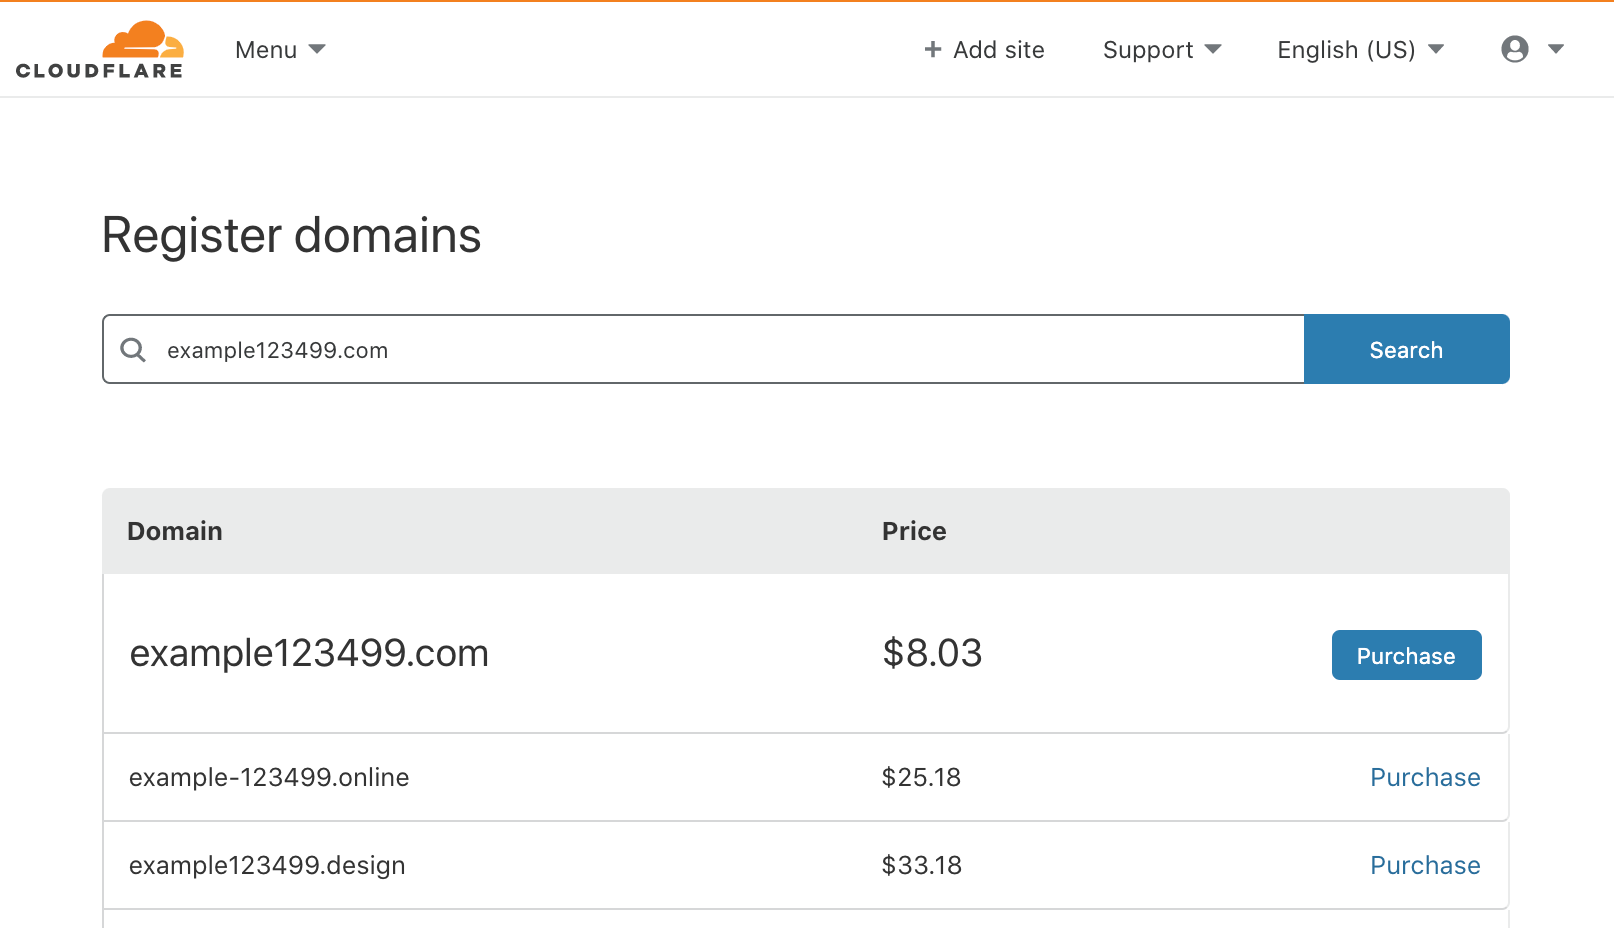
- Get an account at cloudflare.com and register the domain directly there, using the protonmail address you just set up for contact info.
- Note that I wrote this up prior to Cloudflare's recent downtime; feel free to use another registrar if you want, it's not essential to what follows.
- Note also that even though Cloudflare does ask you for information when registering the domain, your registration will be redacted by default.
Step 2: Create a blog at your domain
The next step is to create a blog at ghost.org and map it to a custom domain, as shown below. Note that there are two levels to Ghost:
- There's
my.ghost.org/signin, which configures your Ghost account as a whole - And then there is
$name.ghost.io, which is the admin interface to a single blog (we will useexample123499.ghost.ioin the screenshots below)
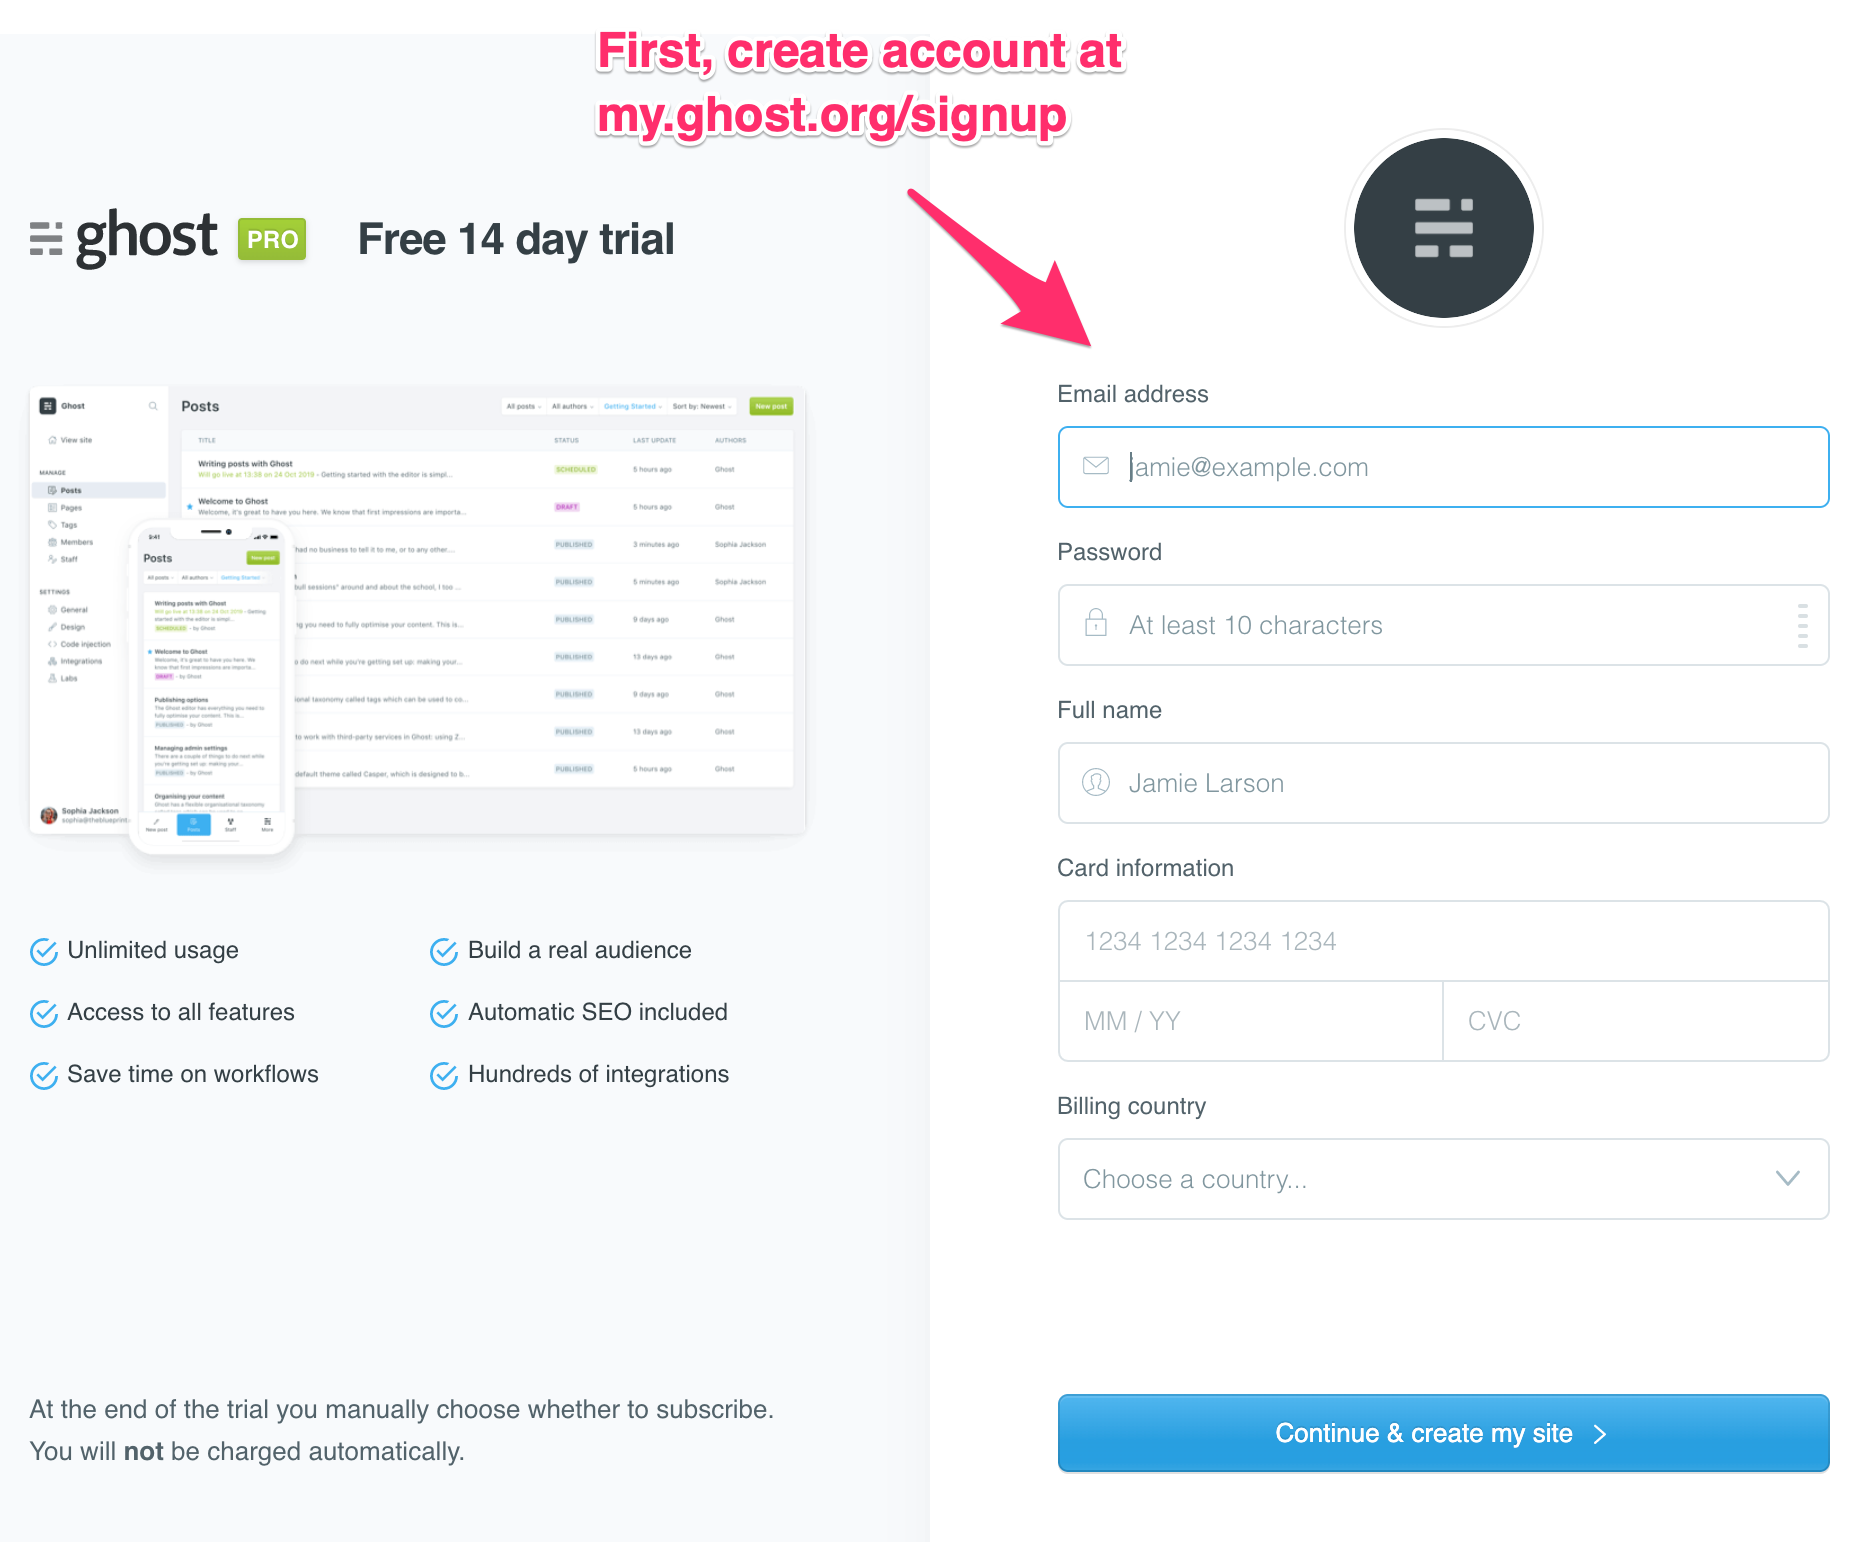
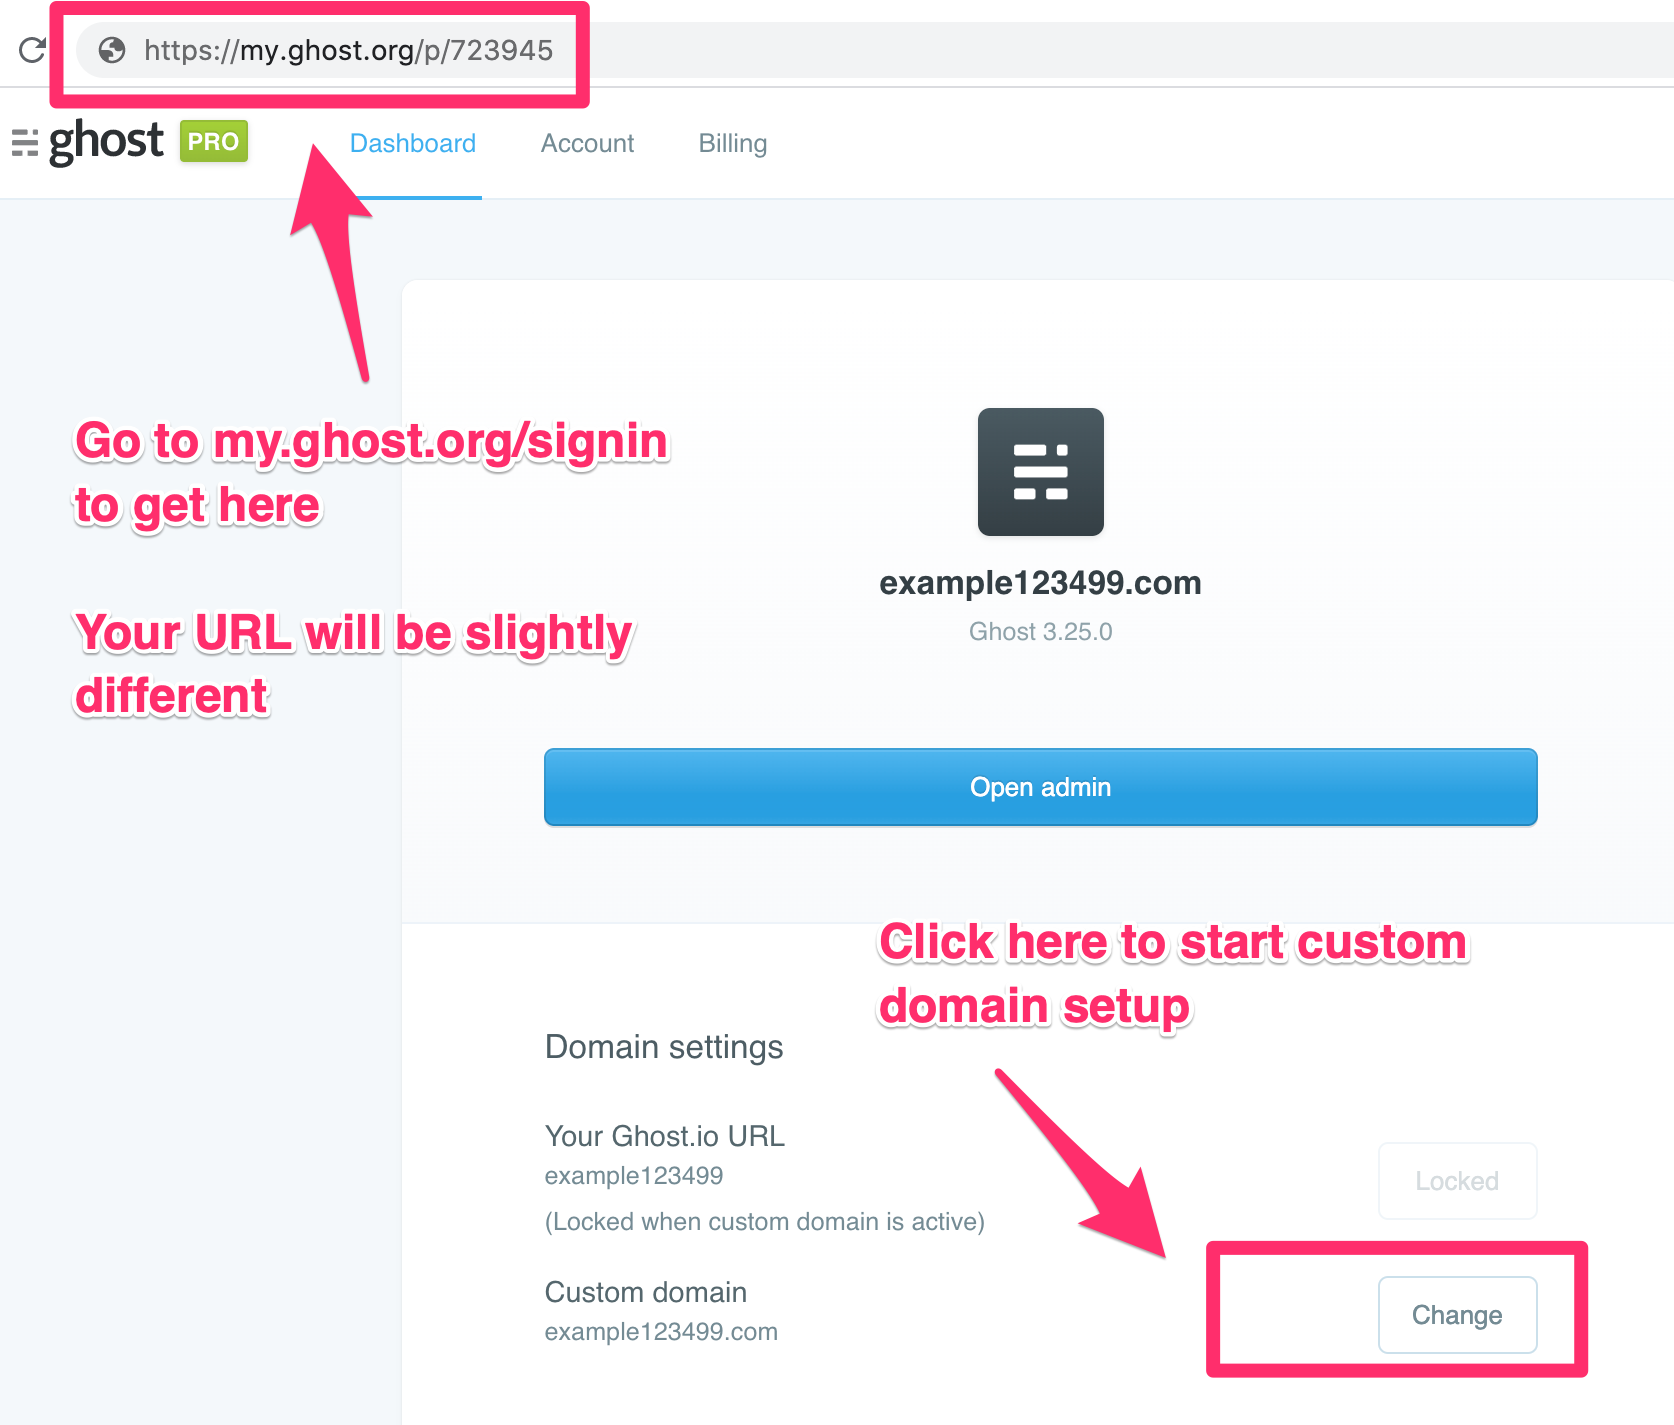
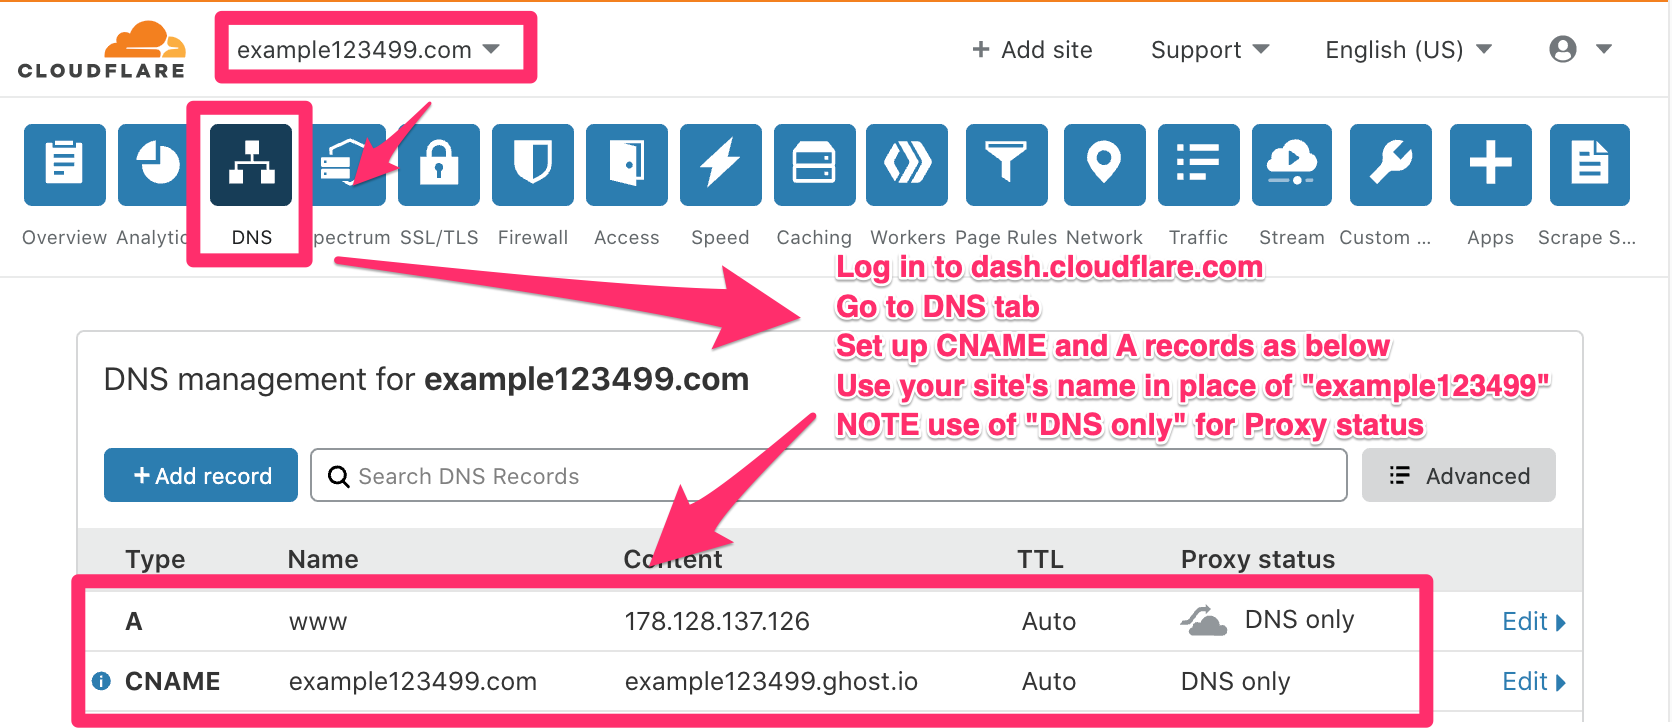
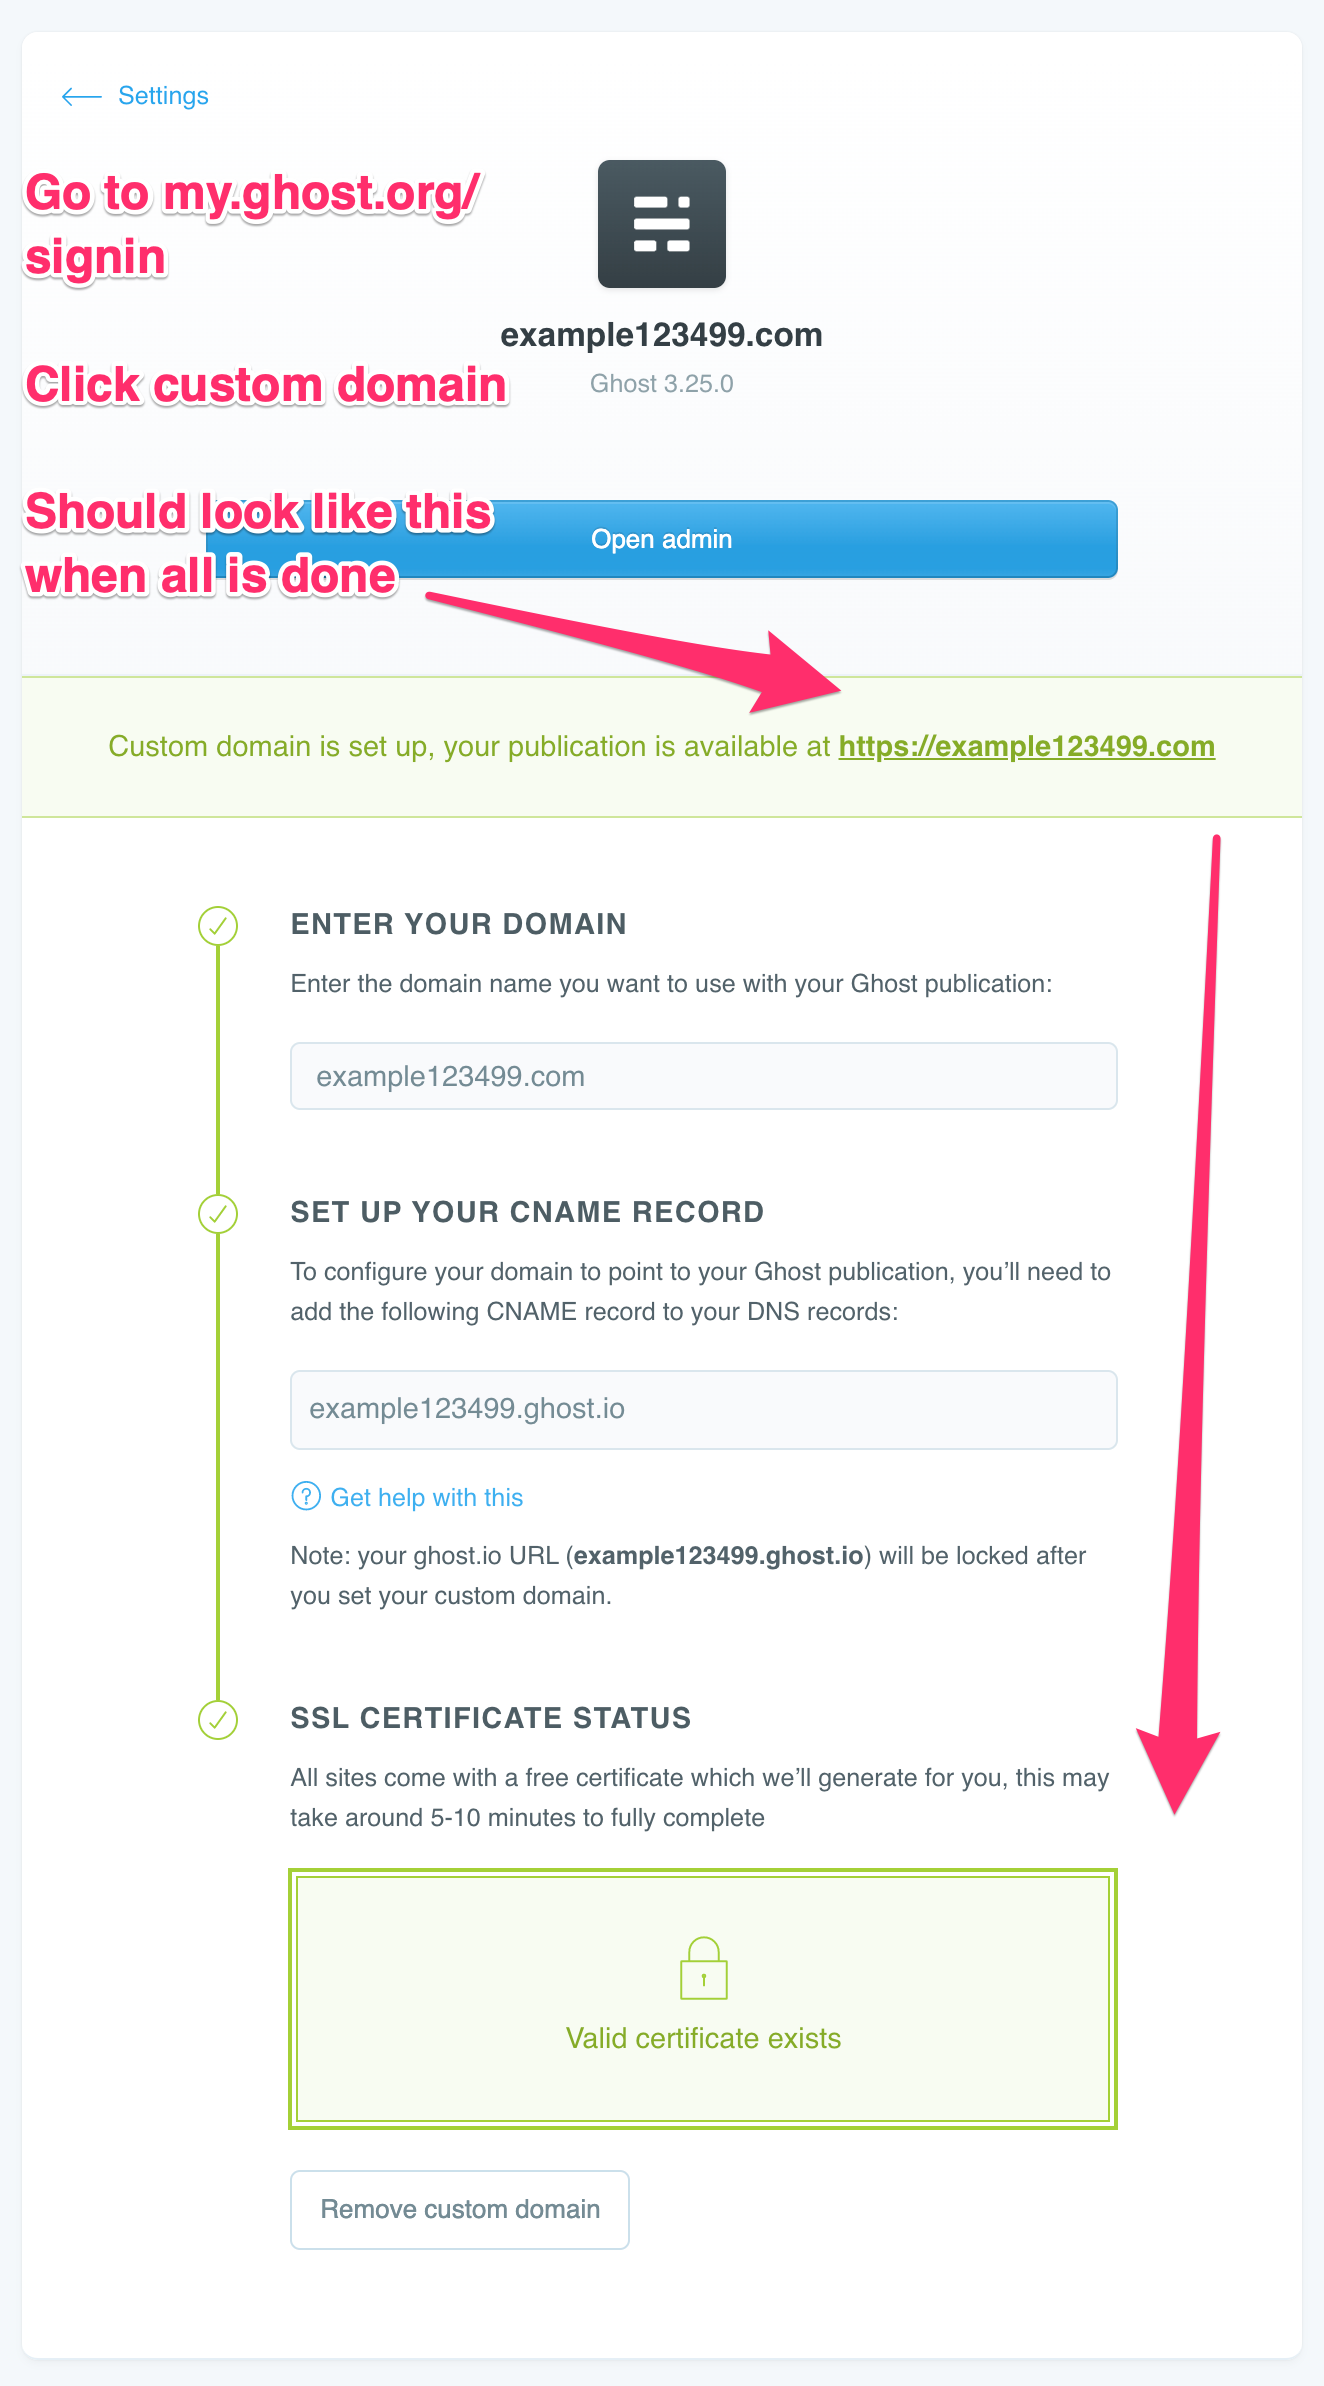
To set up a custom domain on Ghost, you need to first create a blog at my.ghost.org/signup. Then go to my.ghost.org/signin and dash.cloudflare.com to edit the A records as shown in the screenshots below.
The official instructions are here if you need more detail. Once this works, you should find that $name.ghost.io now appears at $name.com. In this example, content from example123499.ghost.io now appears at example123499.com. You now have a blog with a custom domain!
Step 3: Set up memberships and payments
The next step is to turn your blog into a paid newsletter. Ghost includes a pre-built theme called Lyra that sets this up.
- Go to the equivalent of
example123499.ghost.io/ghostto log into the admin interface for your new blog. This is different frommy.ghost.org/signin. The former administers the blog - Read about memberships in Ghost if you want.
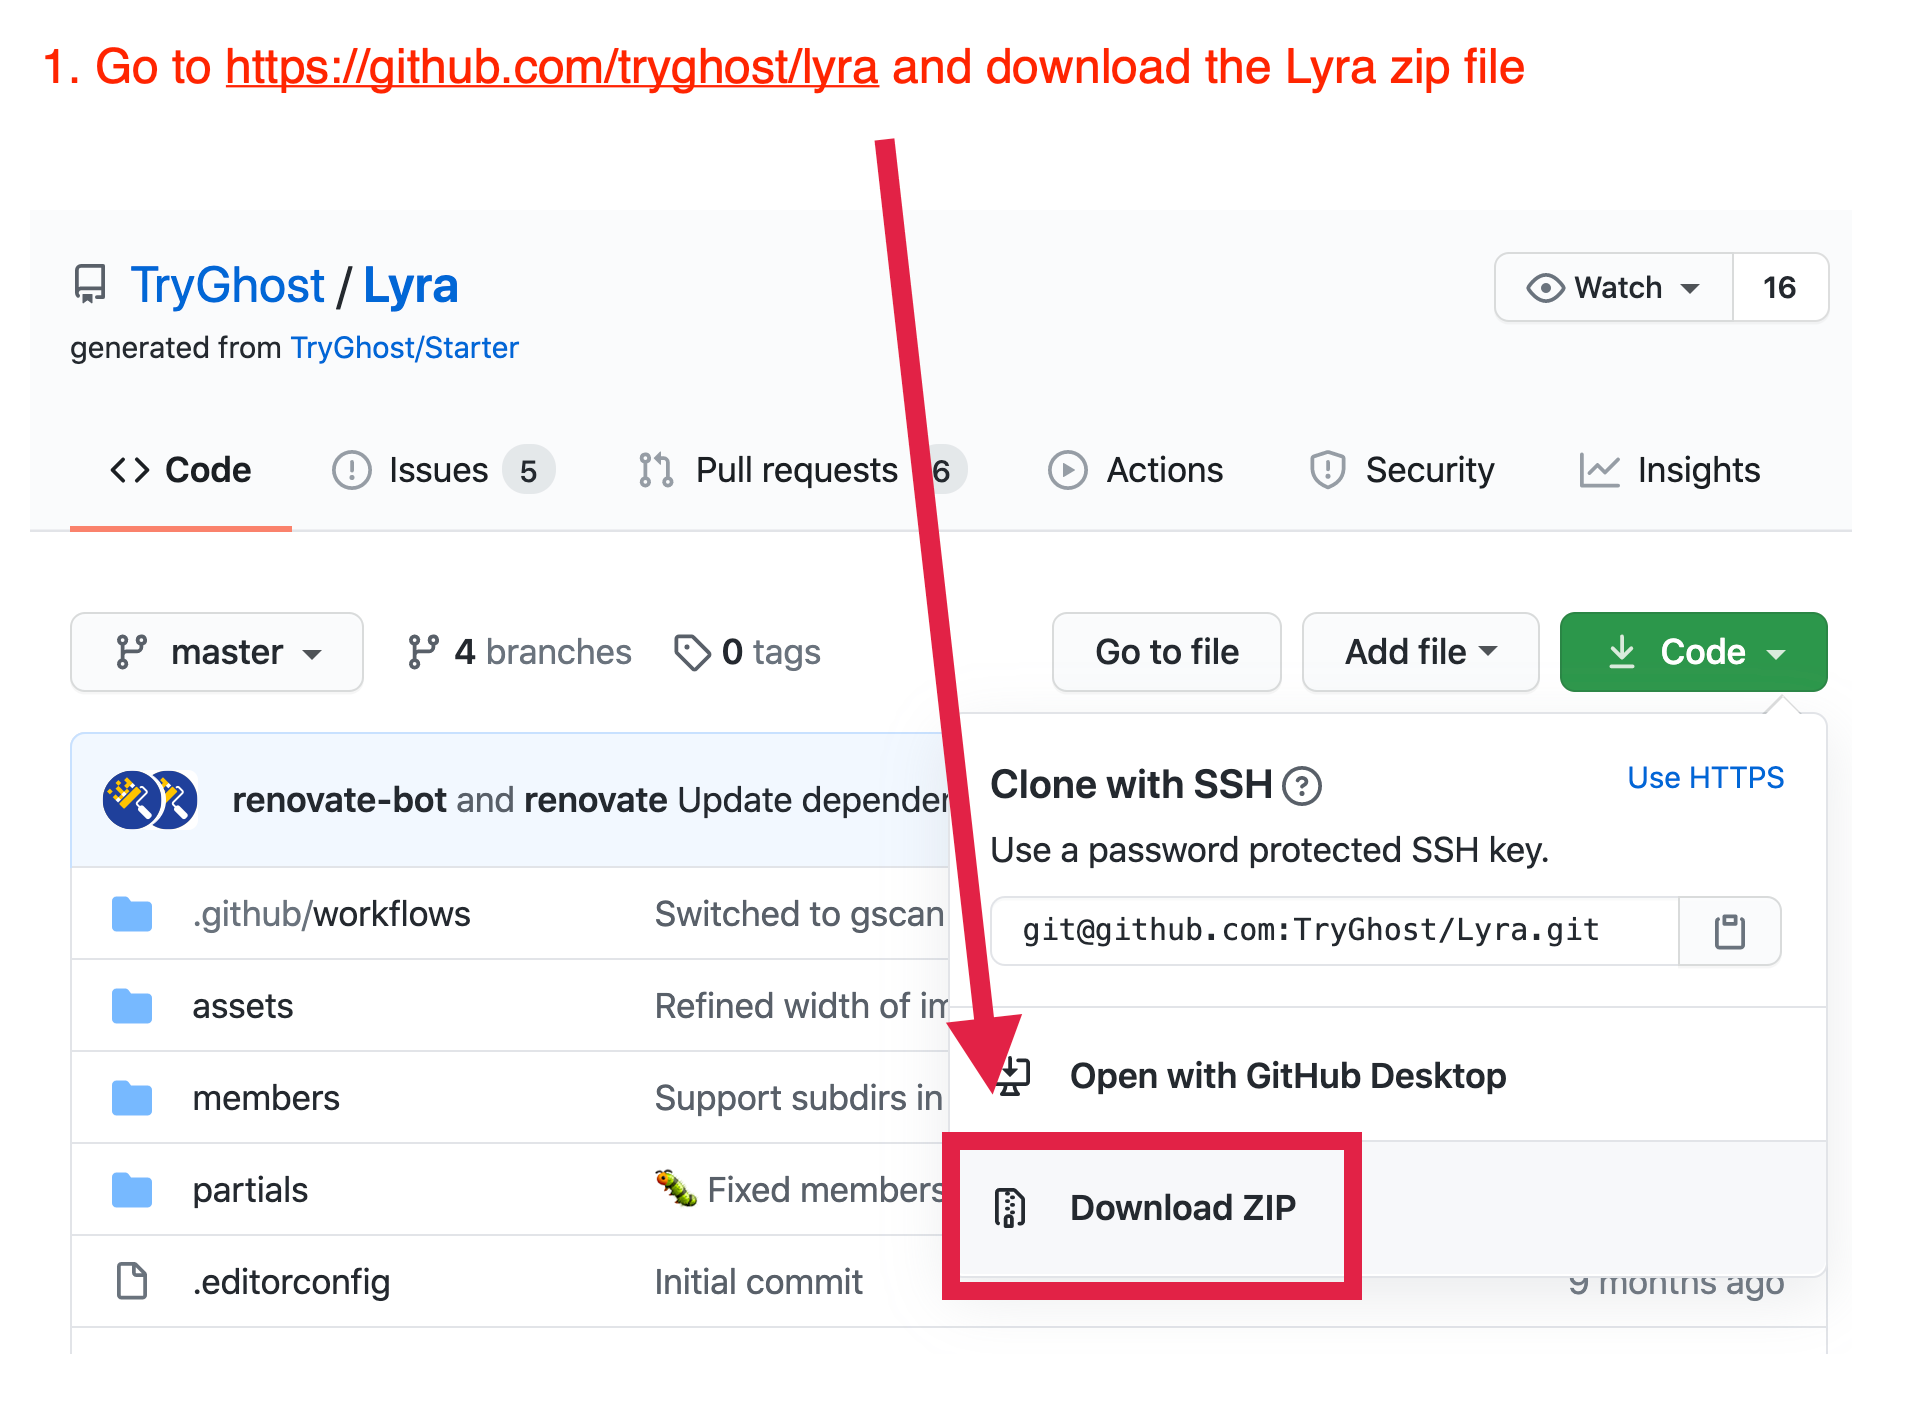
- Then download this Lyra theme zip file
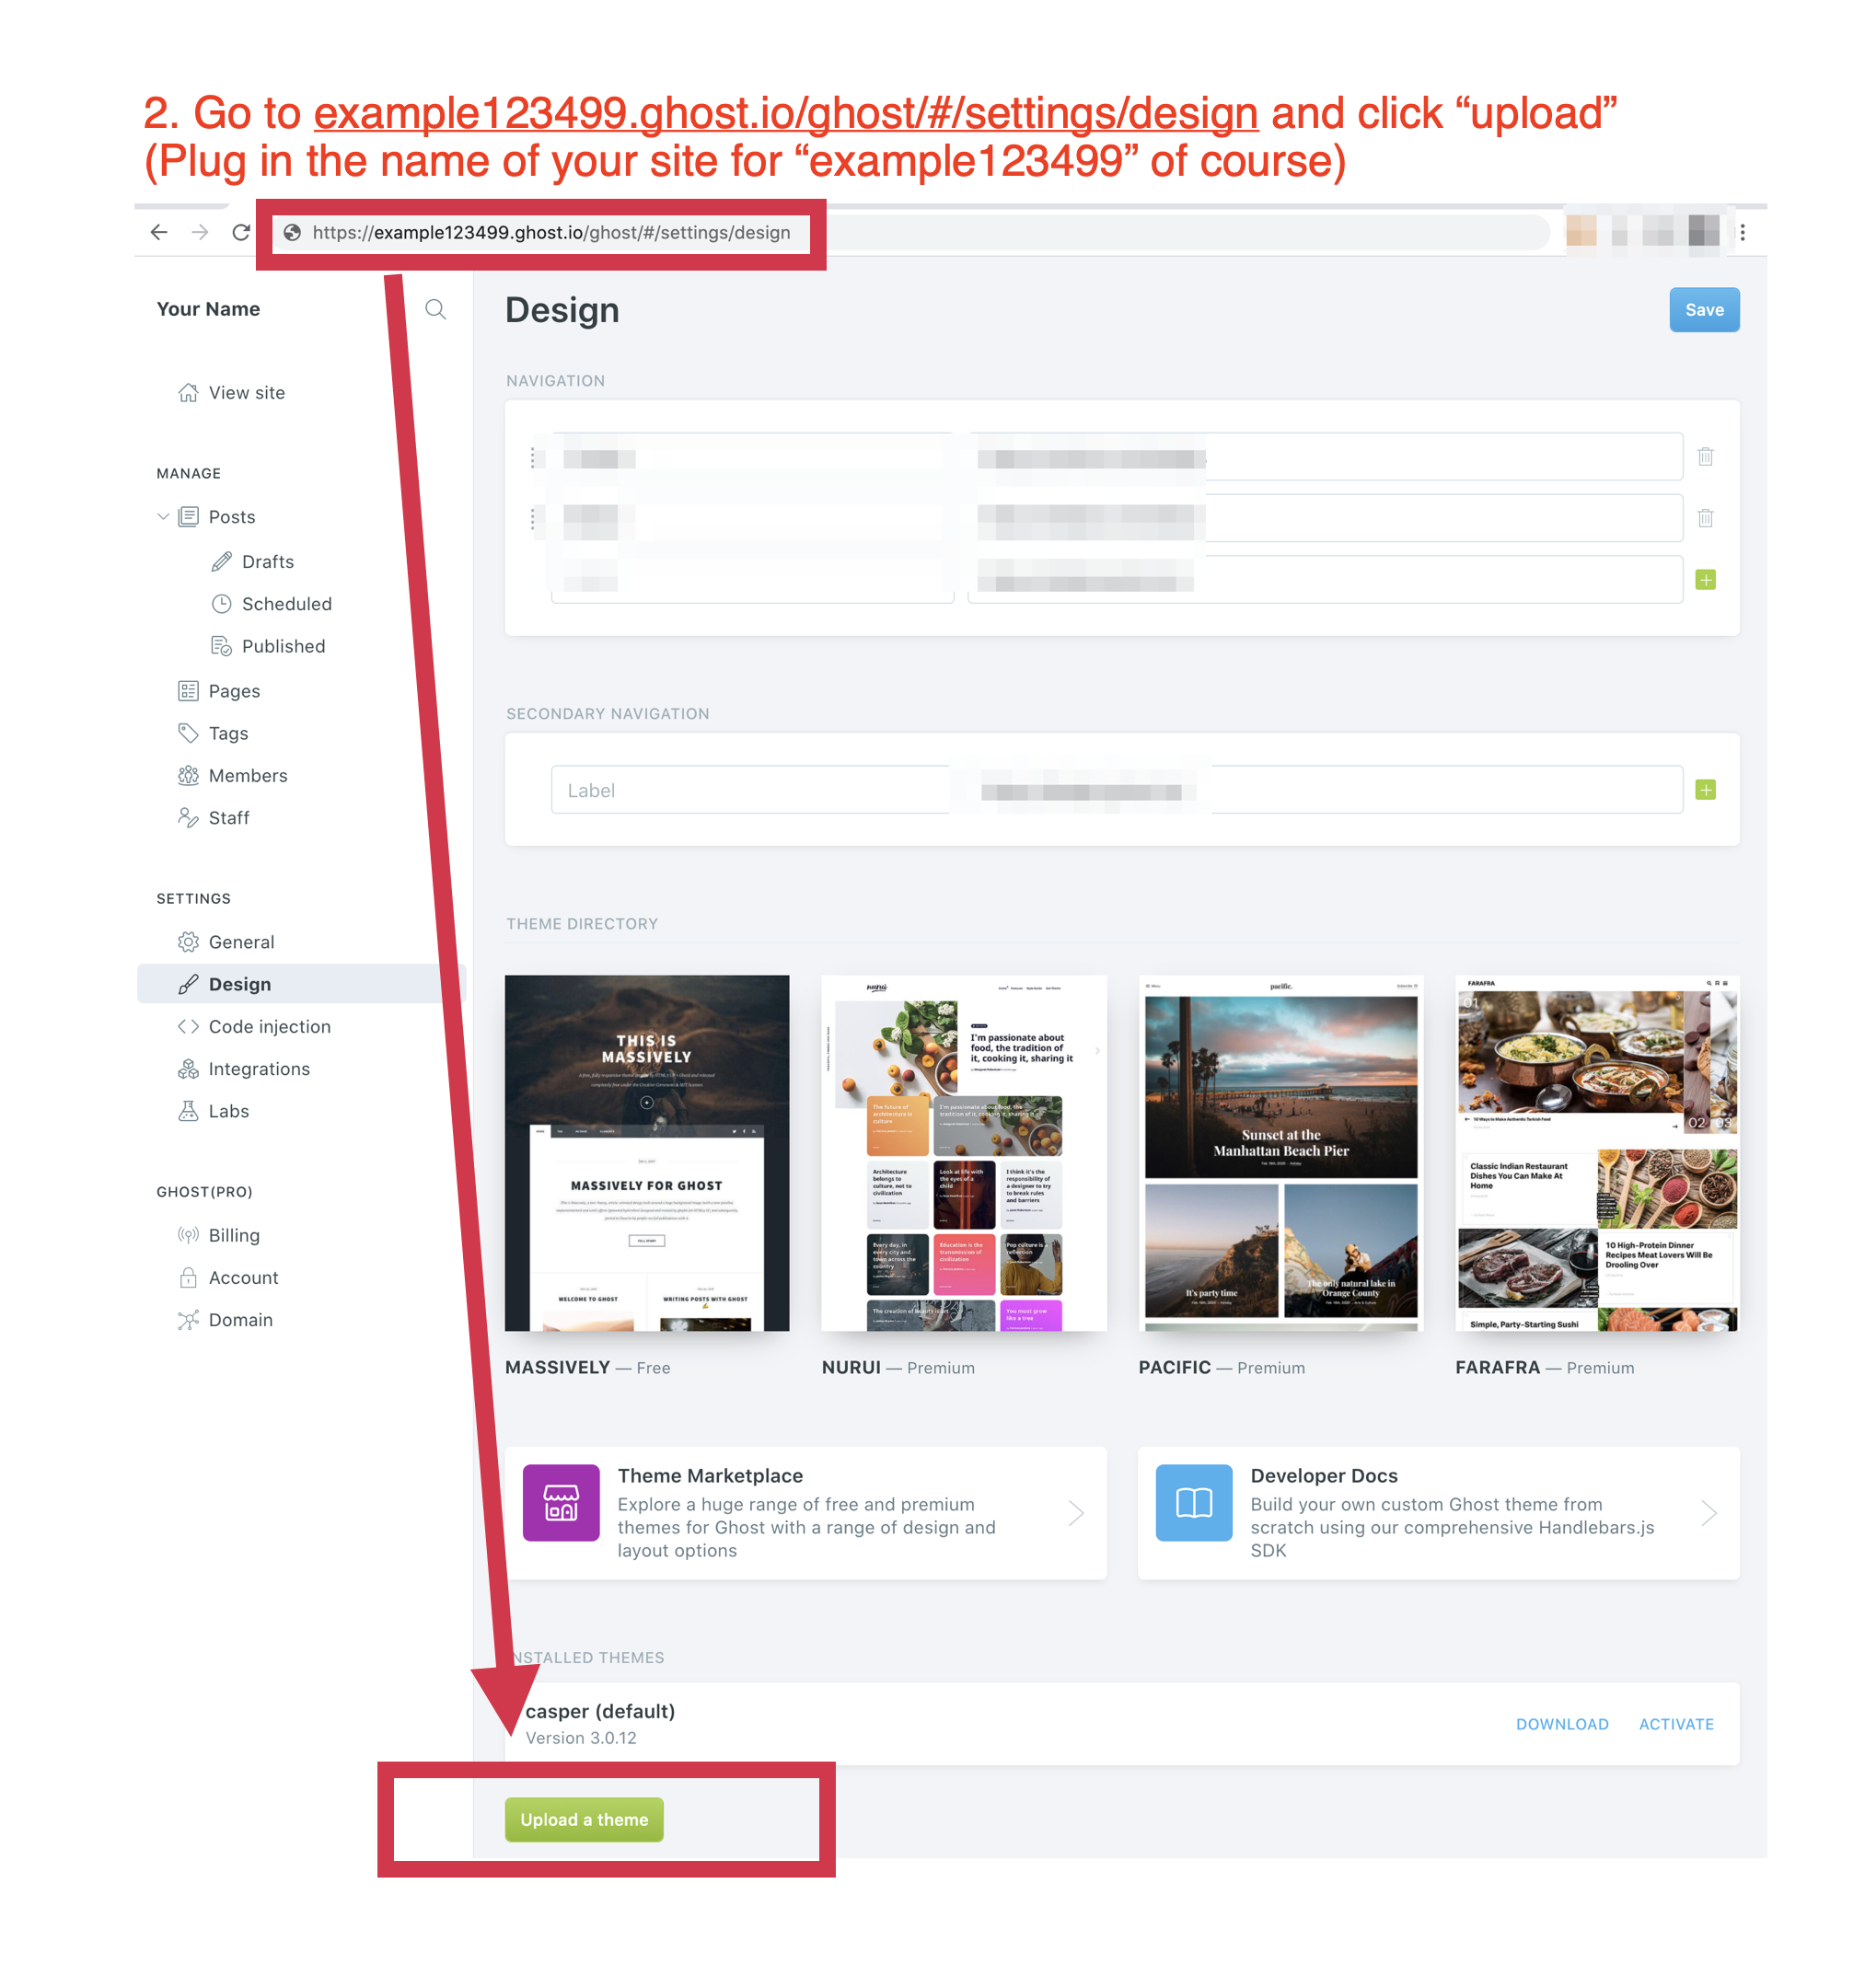
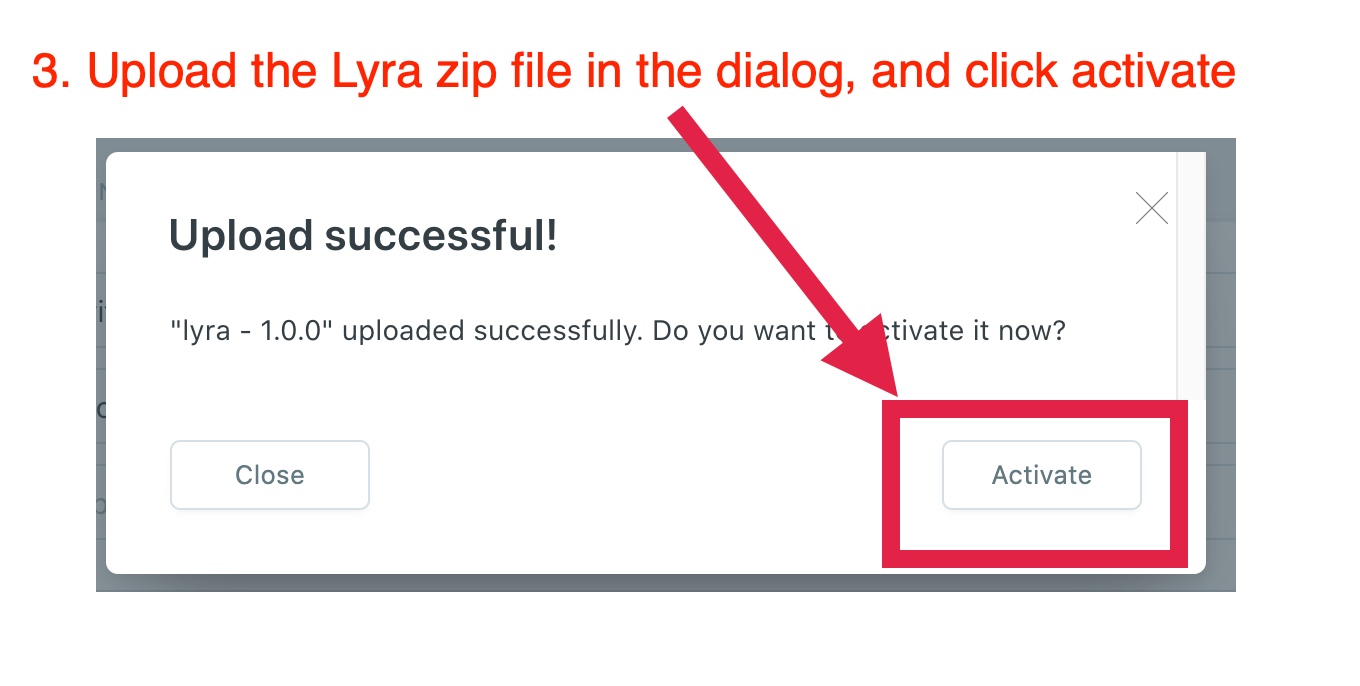
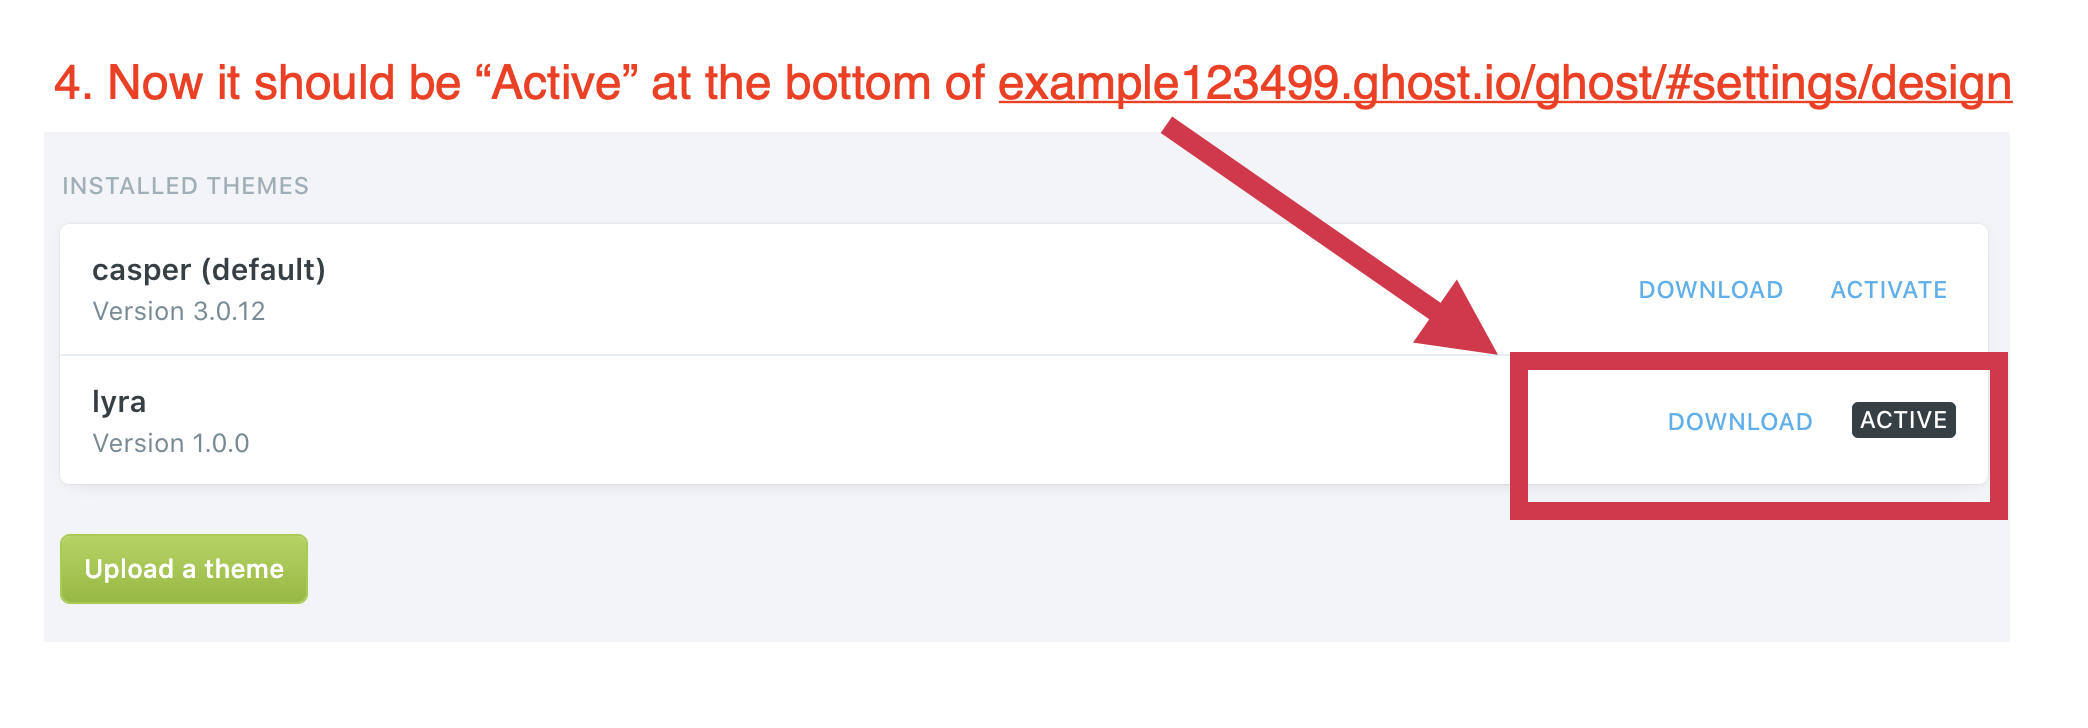
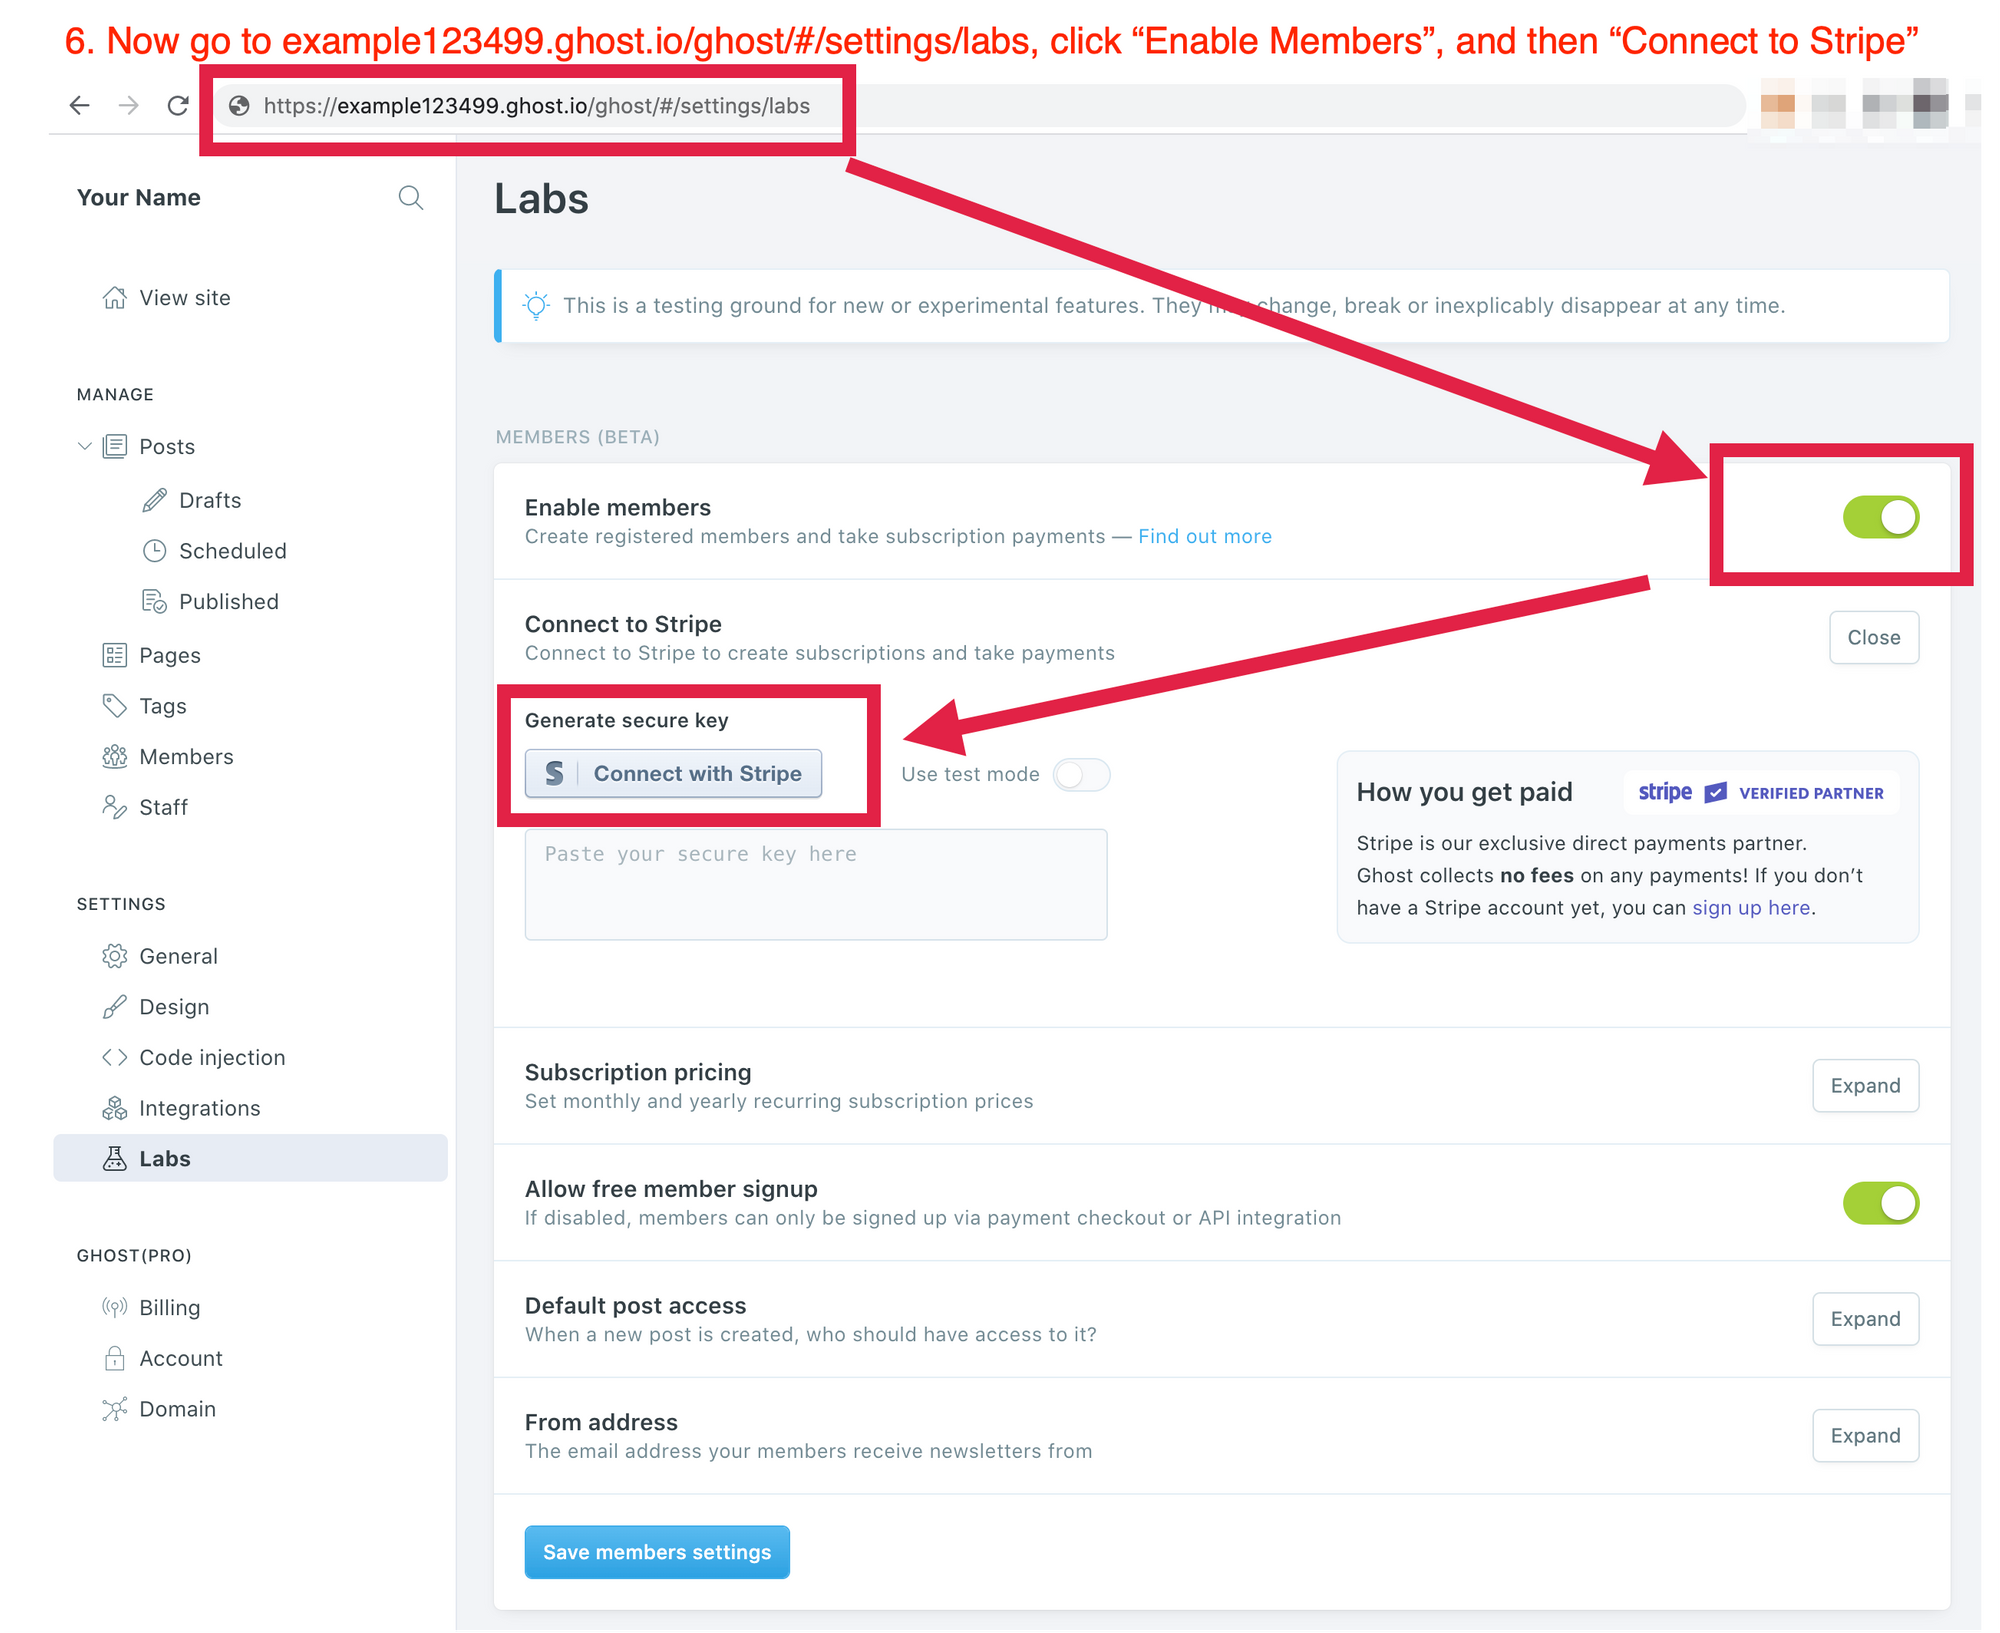
- And upload it to the equivalent of
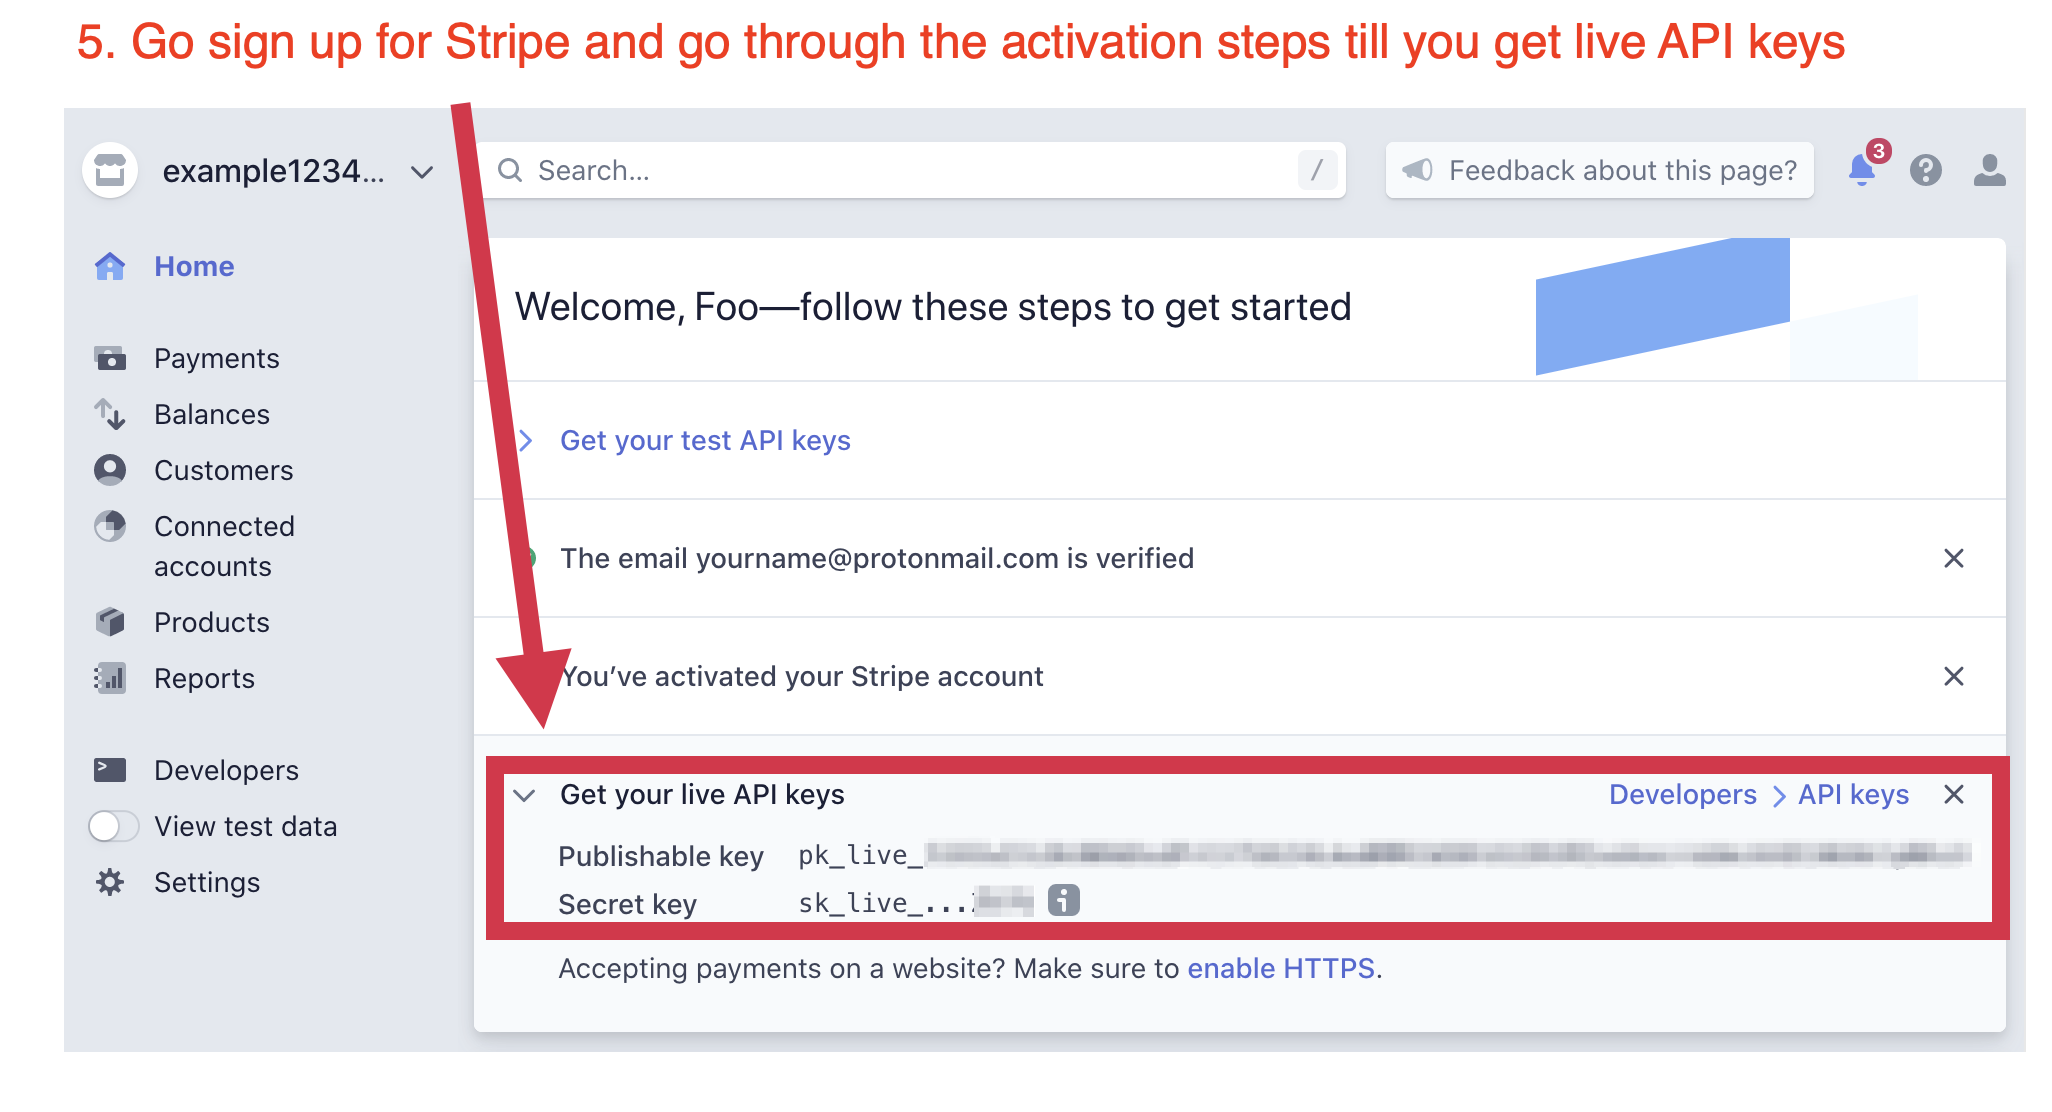
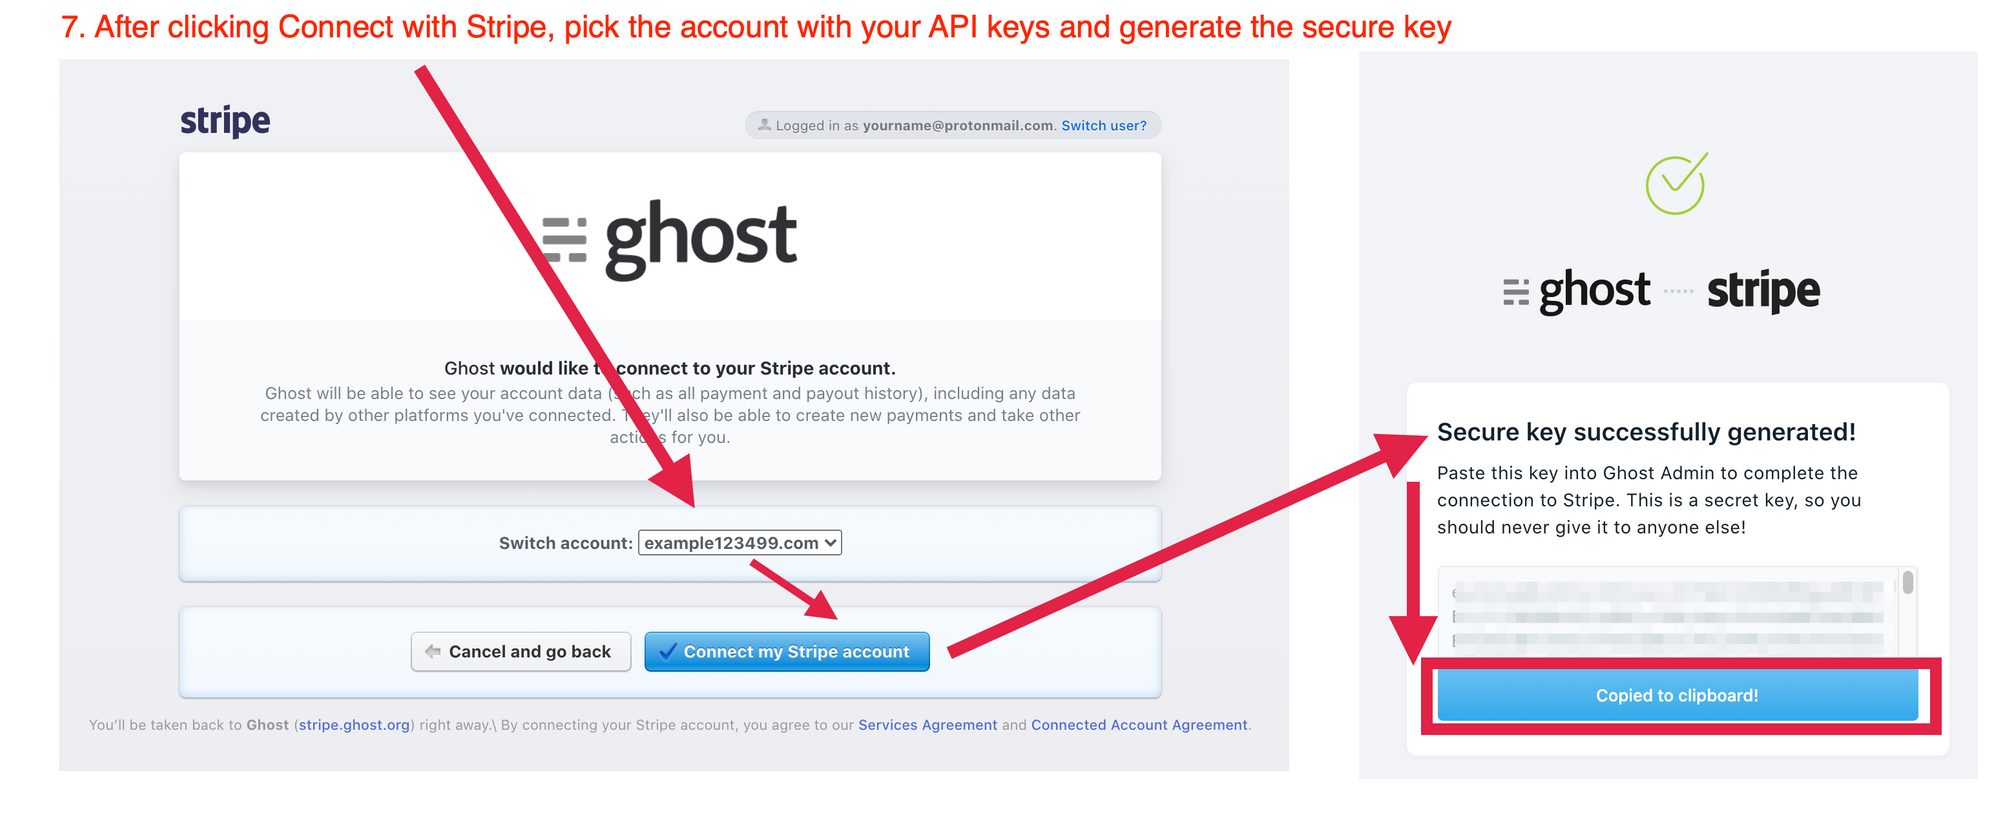
example123499.ghost.io/ghost/#settings/design - Next get a Stripe account, which you can do as an individual
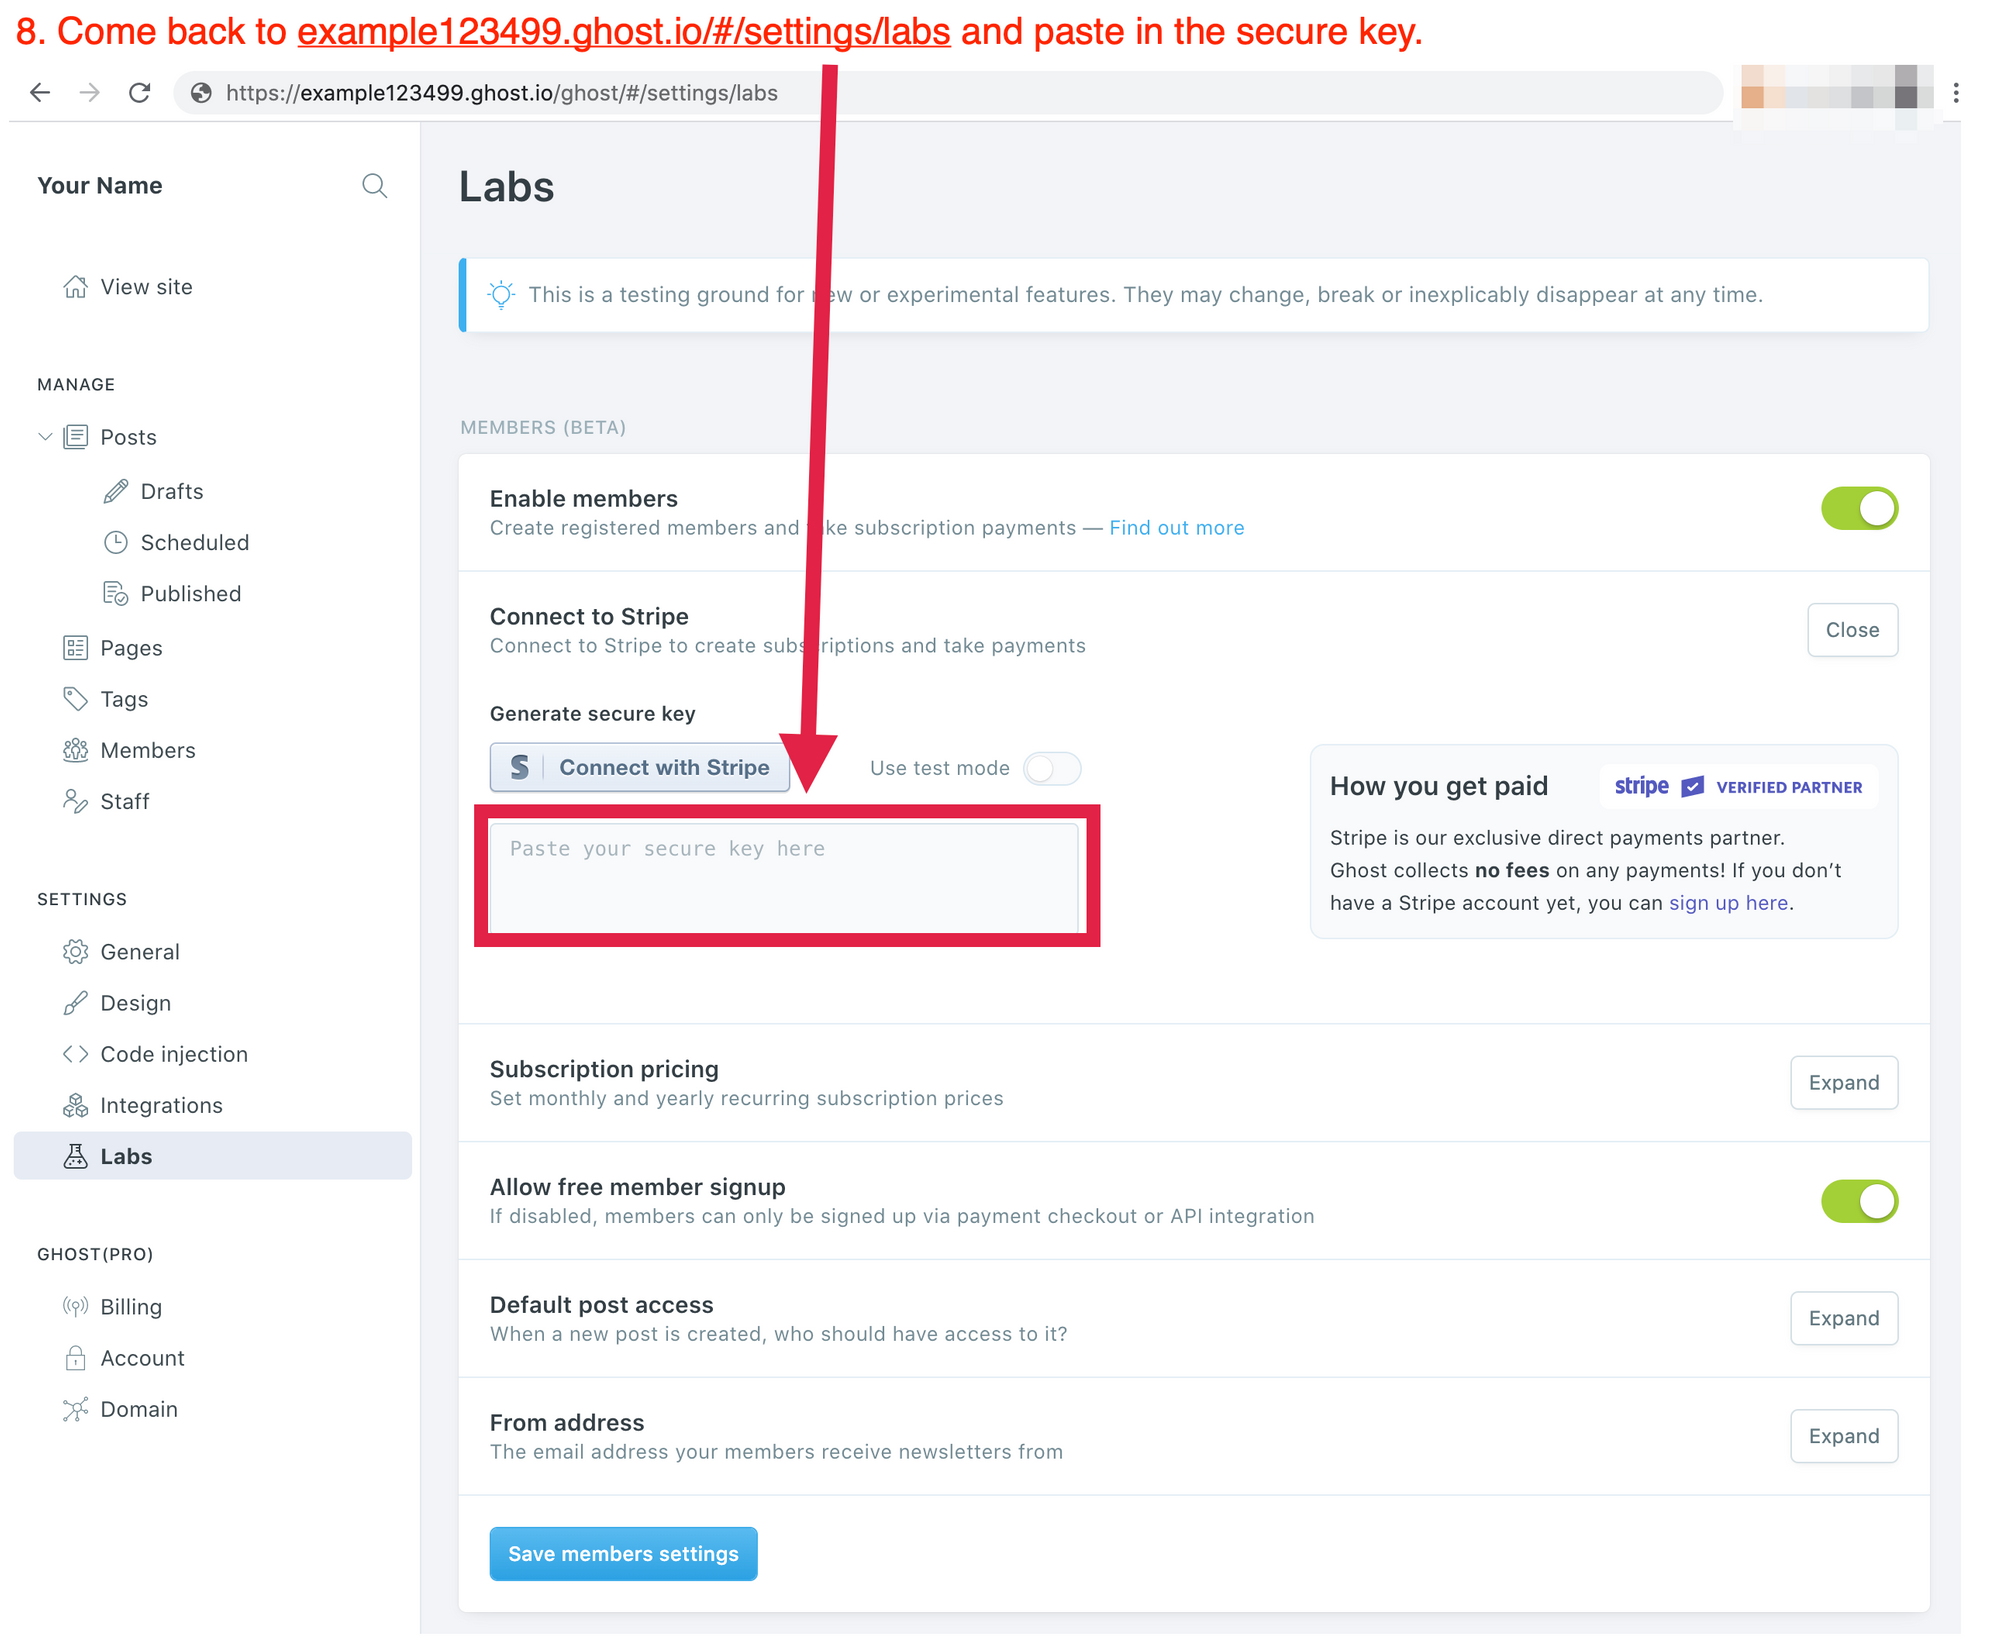
- Paste in the Stripe keys into your Ghost instance in the Labs field
- And configure membership pricing
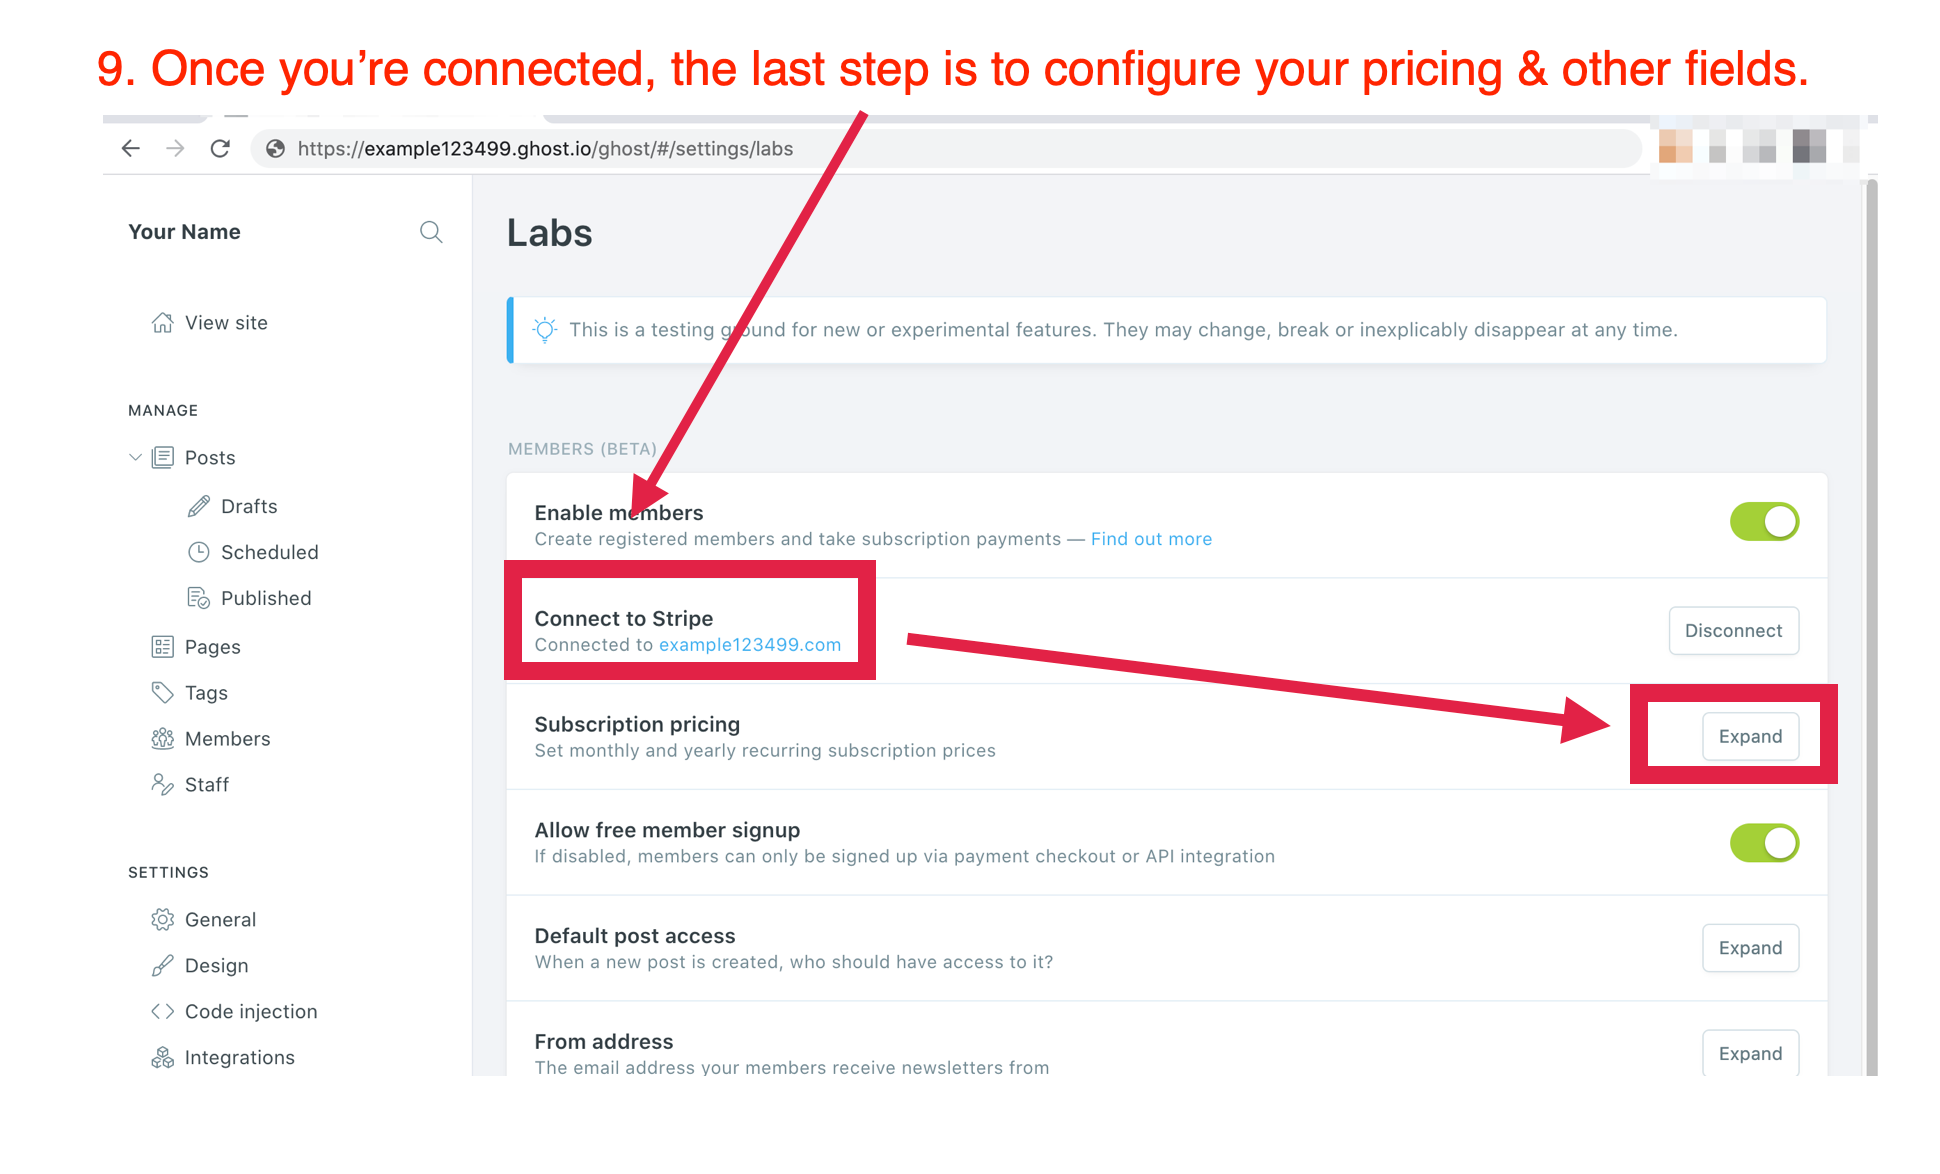
Now users can sign up and subscribe to your paid blog. You can make any given post free or paid, and send out an email newsletter. There are several settings to configure on both the Ghost and Stripe side that you can dig into now that you have the basic thing up and running. Test the whole thing out by getting a friend or two to sign up with their credit card and send them an email.
Step 4: Optionally, set up your imagery
Now you are fully set up to post to Ghost. You can browse the posts here to understand how the system works, or log in to your own Ghost instance at the equivalent URL for example123499.com/ghost. If you want to make your blog look pretty, you'll want to generate the following images:
- publication icon (square, at least 60px x 60px)
- publication logo (600px x 72px)
- cover image (1900px x 400px)
As you use the Ghost Editor, you'll also want to create individual post images for social media preview. You can use Canva or Figma to generate these, as well as Iconfinder for visual inspiration. You can also install a desktop client for editing Ghost posts.
Step 5: Optionally, customize your theme
If you're a developer and want to modify the look of your site, you can set up your Ghost theme for deployment via GitHub. You would do that by forking Lyra and then setting up this action. Now, every time you push a commit, the action triggers and the theme updates. You can also preview your edits by running Ghost locally.
Why might you want to edit your theme? By doing this you can edit the default copy on various pages, create new page templates, and the like.
Note that if you don't want to use the Lyra theme itself as a base, you can buy a pre-built one or learn how to customize Ghost themes yourself. If you do buy a theme, remember to get one of the themes that support Ghost memberships, as not all of them do.
Conclusion
This whole thing should take you about an hour or so. By the end you'll have a decent looking blog at your own domain that can handle memberships, accept payments, and send out a paid newsletter. And it can be pseudonymous if you choose.